An Intergalactic Companion
As a person who tends to get hot very quickly, I can’t imagine getting close to the sun. So, I decided to use the 31 IR Obstacle Avoidance Sensor to give adventurous intergalactic travelers a cool experience near the sun with the help of a DC Motor fan. Along with the cooling effects, these users will have their own personal screen displaying their relation to the sun.
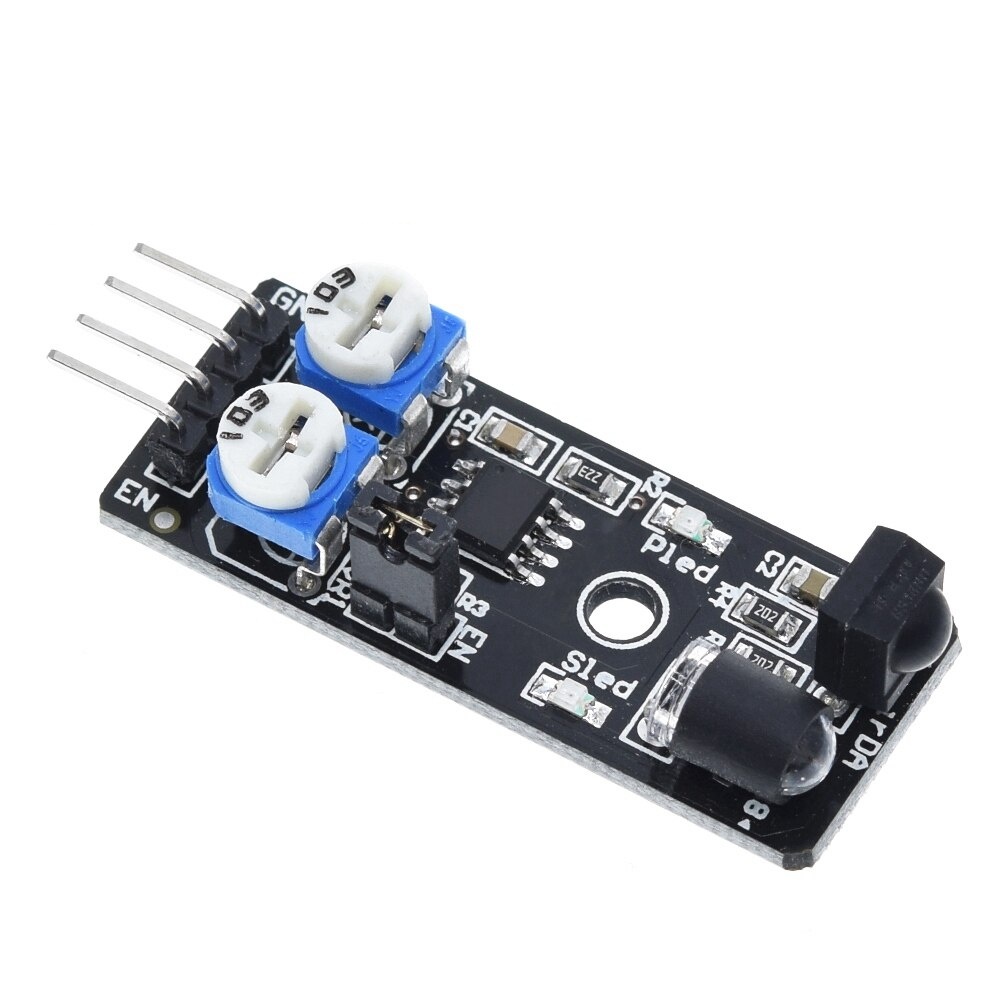
Though the use of this project exists in quite a fictive realm, it relies on one sensor not included in the Elegoo Kit: the 31 IR Obstacle Avoidance Sensor. In a very basic sense, this sensor emits infrared light, able to be perceived by an infrared sensor. Once an object lies within the path or scope of the sensor, the infrared light is reflected and picked up, telling the arduino that an object is a certain distance away. The distance is quite arbitrary and determined by one of the potentiometers on the sensor itself.
The sensor, although equipped with four prongs, is only wired with ground, 5V, and any of the pins 2-13 (quite like the servo motor).
The coding for this sensor is also quite straightforward, needing the pin number where the sensor attached, a variable or boolean to hold the status of the sensor. Though, one thing that is a little backwards (to me at least) is that when an obstacle is detected, the state of digitalRead() is LOW. So, to clarify, when an object is in front of the sensor, the value of your variable or boolean is LOW, if there is nothing it is HIGH.
const int avoidPin = 7;  //tell the arduino the sensor is attached to pin 7
void setup()
{
  pinMode(avoidPin, INPUT);  //set the pin as an input
}
void loop()
{
  boolean avoidVal = digitalRead(avoidPin);  //read the value of pin7
  if(avoidVal == LOW) //if the value is low then do something (obstacle in front of sensor)
  {
   ***do something***
  }
  else  //if the value is high do something else
  {
    ***do something***
  }
}
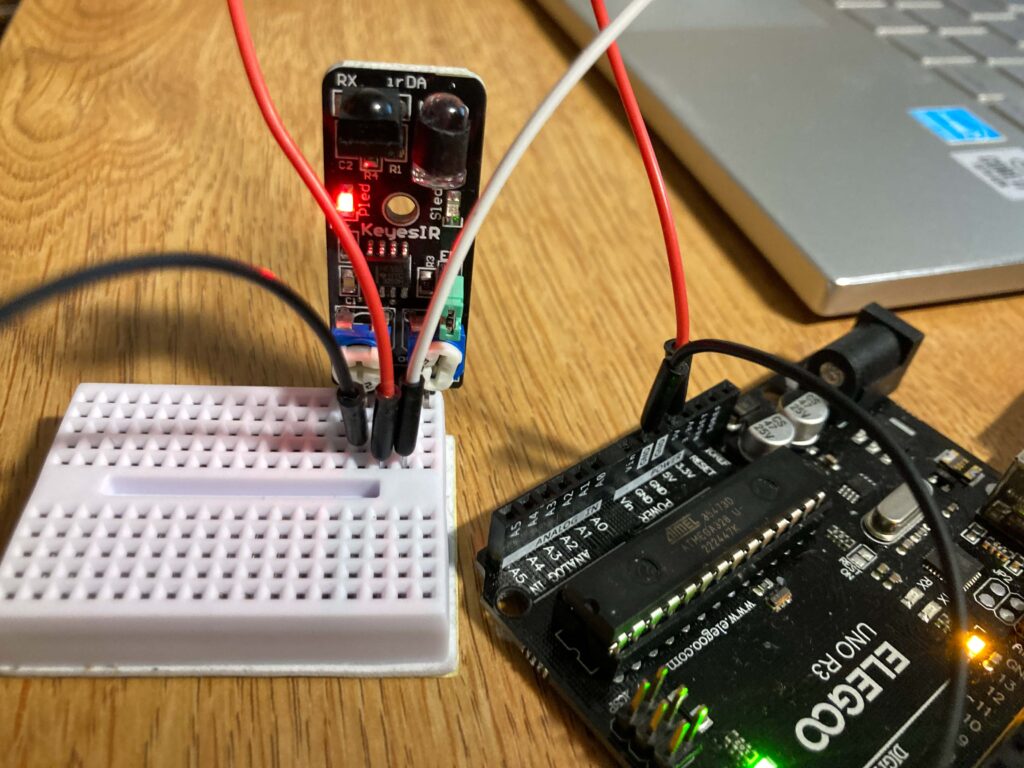
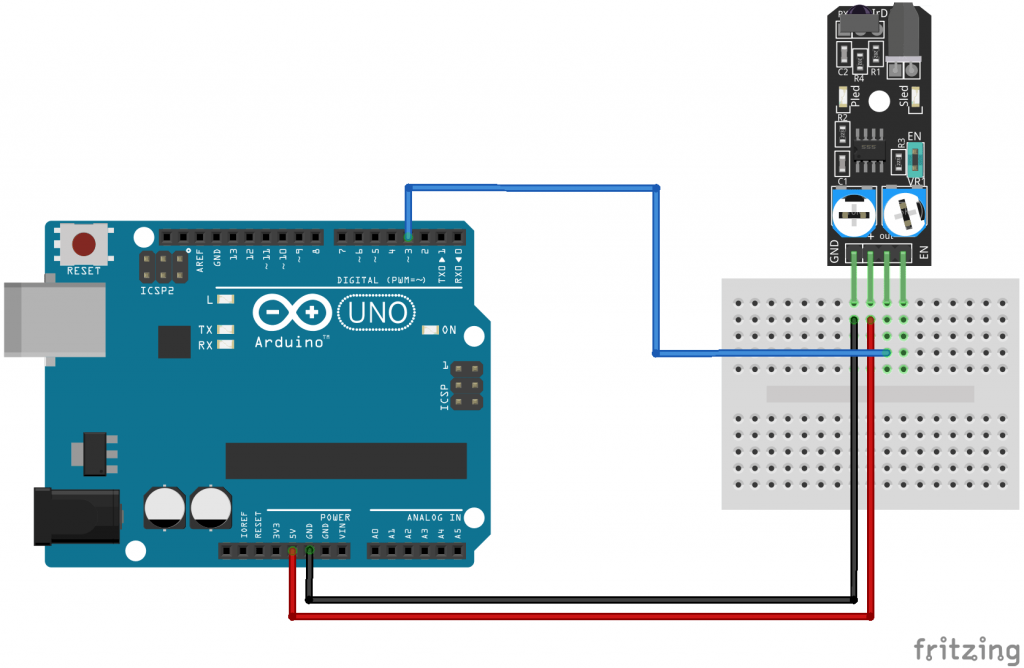
I started building my project with the basics, just wiring the sensor on a small breadboard and using the code given on this website:
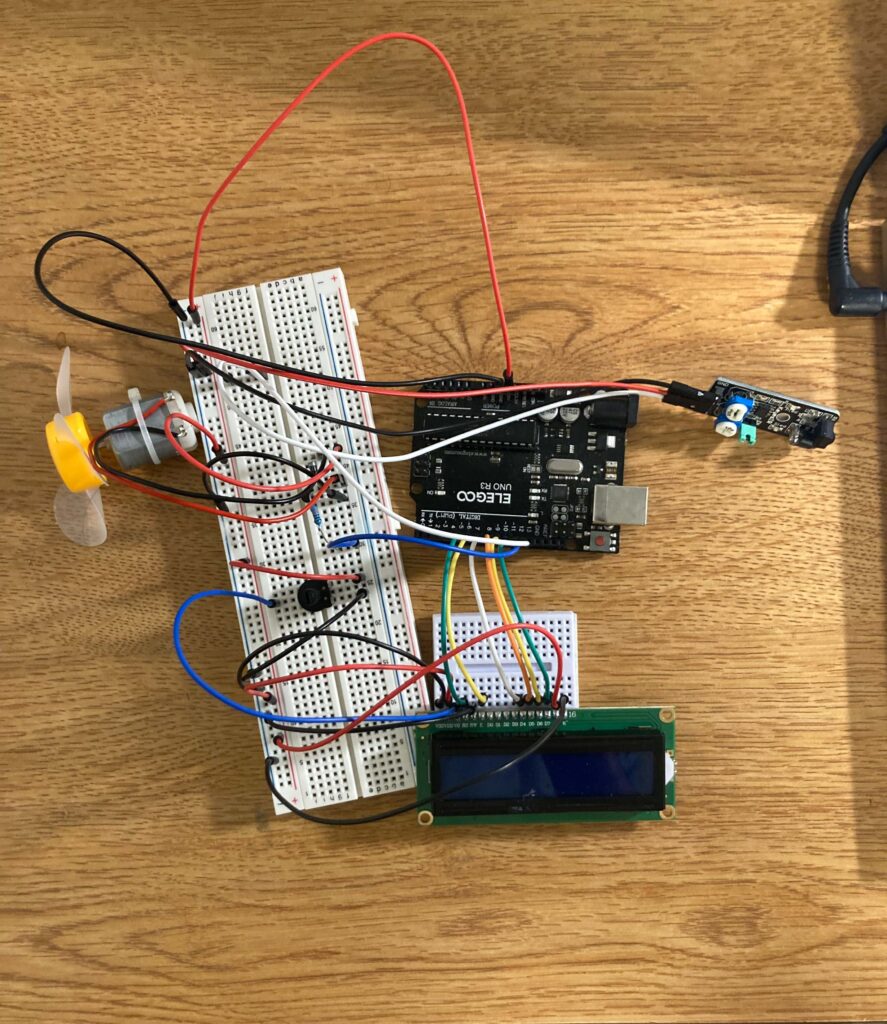
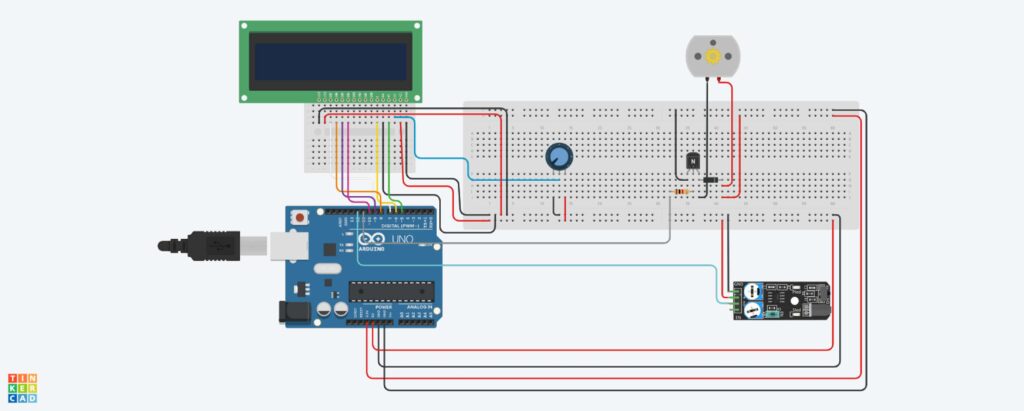
After this first stage, and the inspiration for the final product (of using the sensor to sense the the sun –> turning on a fan), I directed my attention to assembling my project to include all three components: obstacle sensor, DC motor, and LCD screen. The first iteration of the wiring looked like this:
As I started working with all components at once, I noticed the LCD screen acting in a strange way. When there was an object detected, I wanted the a message to come up on the screen and the fan to blow at the same time. Yet, the message would only show for a split second before the screen would go white, as in the video below.
I then had a hunch that the fan and LCD screen were having dificulties dialoguing with each other, connected to the same 5V and ground lines, thus the descent into an LCD disarray. I confirmed that the DC motor would be okay working on it’s own line on this website, which says they can use as few as 1.5V (which did not necessarily answer my question. With the rewiring below, I seemed to have found a solution, 3.3V and a ground line solely for the fan.
I then played around with displaying a message on the screen and turning on the fan while there was an object (my hand) in the sensor’s path. When there was no object in the way, the LCD screen would clear.
The last issue I had was introducing messages both with and without an object blocking the sensor’s path. I wanted to display a sequence of messages (shown later) while the digitalRead() of the sensor was low, versus one, sole message with a high reading. My main issue here came from the fact that I needed to clear the screen before the sequence could play, so I created a variable, lcdVal, that would increase each time my if condition for a low reading would be true. Then, when there was a high value, I nested another if conditional that needed lcdVal to be greater than zero to display the singular message (resetting lcdVal to zero) so that if the value was still high the next iteration, the message would not change. This skeleton of a code should hopefully clarify:
void loop()
{
  boolean avoidVal = digitalRead(avoidPin);  //read the value of pin7
  if(avoidVal == LOW) //if the value is LOW level, object in path
  {
    ***display alternating messages***
    lcdVal++;
  }
  else  //else, path is clear
  {
    analogWrite(motorPin, 0);
    if (lcdVal>0){
      lcd.clear();
      ***display message***
      lcdVal=0;
  }
  }
}
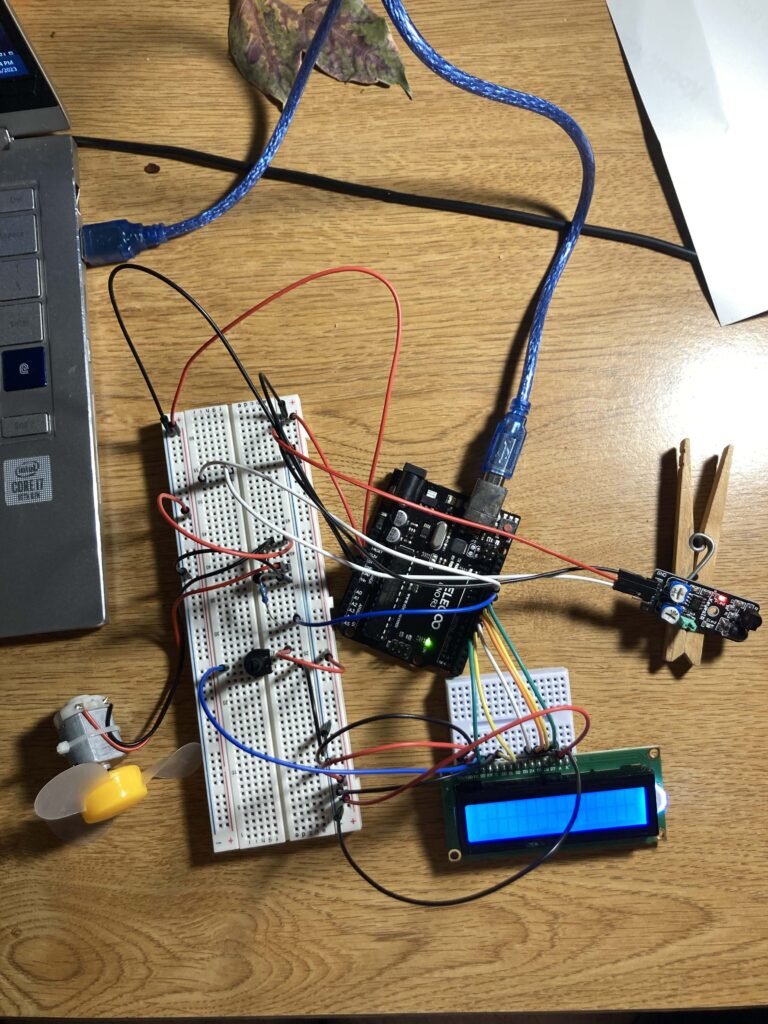
And, after some shifting, taping, and assembling, this is the final product:
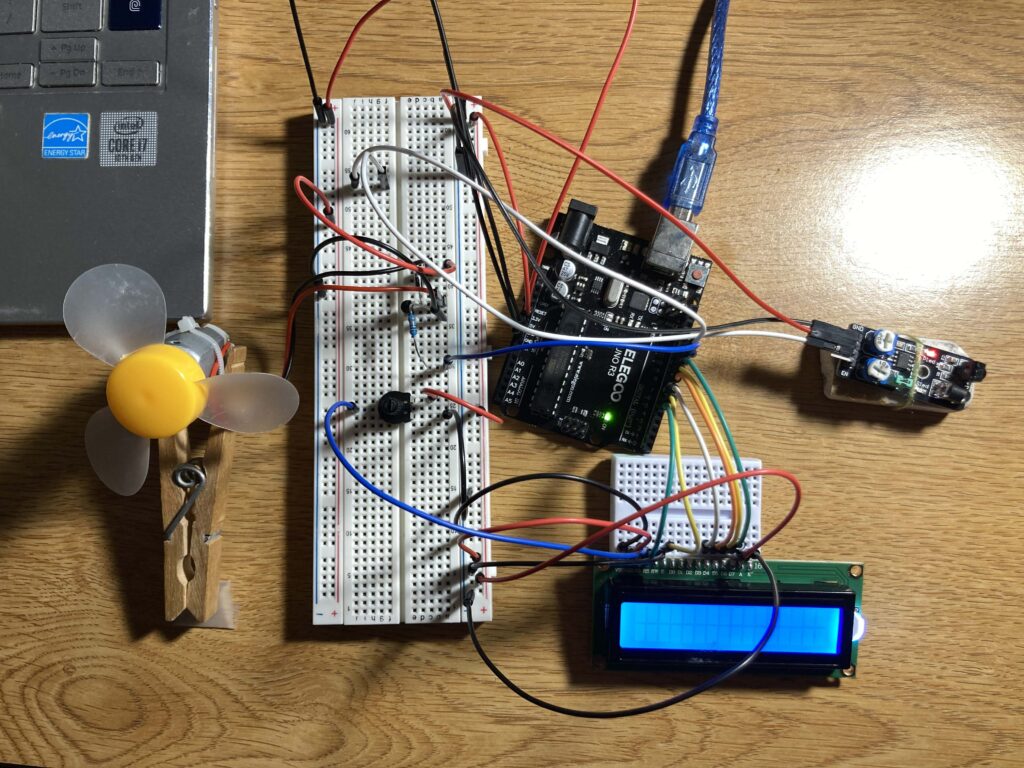
Video of final product: https://drive.google.com/file/d/1WAO2rdhOpdtdYwkZ3f-U-Tk8CnZIjtti/view?usp=sharing
Video of LCD on final product: https://drive.google.com/file/d/1miZp0vkAiKWphvdjQ-hPwRsKZzdogmBB/view?usp=sharing
Plus the complete code: https://create.arduino.cc/editor/auzeis15/29f19541-dde9-4a6d-a2e3-00bda90b80ac/preview
Links
DC Motor
Voltage:https://www.clear.rice.edu/elec201/Book/motors.html#:~:text=Typical%20DC%20motors%20may%20operate,typically%20available%20with%20these%20values Wiring: https://learn.adafruit.com/adafruit-arduino-lesson-13-dc-motors?view=all
Troubleshooting: https://www.tutorialspoint.com/arduino/arduino_dc_motor.html
IR Obstacle Avoidance Sensor: https://docs.sunfounder.com/projects/sensorkit-v2-arduino/en/latest/lesson_31.html
LCD Screen: https://arduinogetstarted.com/tutorials/arduino-lcd
Wiring: https://www.tinkercad.com/things/hPeCZzNg0wZ
Image for the sensor on wiring: https://arduinomodules.info/wp-content/uploads/Arduino_KY-032_IR_obstacle_avoidance_sensor_connection_diagram-1024×668.png
Leave a Reply