Angelica Jones
My random sensor was the MQ-J2.
Some Basic Info:
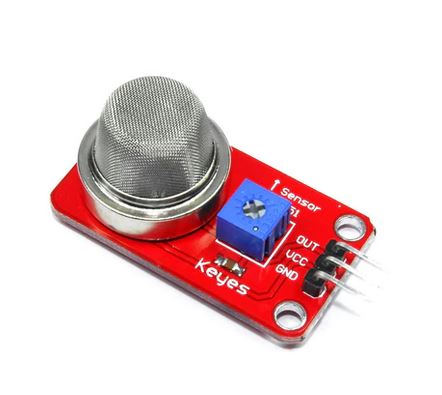
The MQ series of gas sensors use a small heater inside with an electro-chemical sensor. They are sensitive for a range of gasses and are used indoors at room temperature. The output is an analog signal and can be read with an analog input of the Arduino. The MQ2 gas sensor detects multiple gases, but cannot identify them.
An onboard potentiometer allows you to adjust the trigger volume so that you can tailor sensitivity to account for the projects surrounding background levels.
There is a preheat time that is required for this device to work properly. For the most accurate results, the sensor should preheat for 24 hours (this shouldn’t be necessary for anything we do in class though). The sensor becomes very hot after a while, don’t touch it!
The MQ2 is a heater-driven sensor. It is therefore covered with two layers of fine stainless steel mesh known as an “anti-explosion network”. It ensures that the heater element inside the sensor does not cause an explosion because we are sensing flammable gasses.
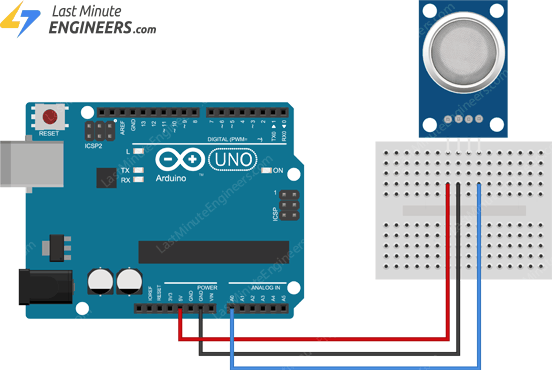
Wiring:
The MQ-J2 comes with 3 pins (VCC, GND, and OUT). I have confirmed that the output pin can detect analog, but I have yet to test if it does digital. The wiring is extremely straight forward.
The Code:
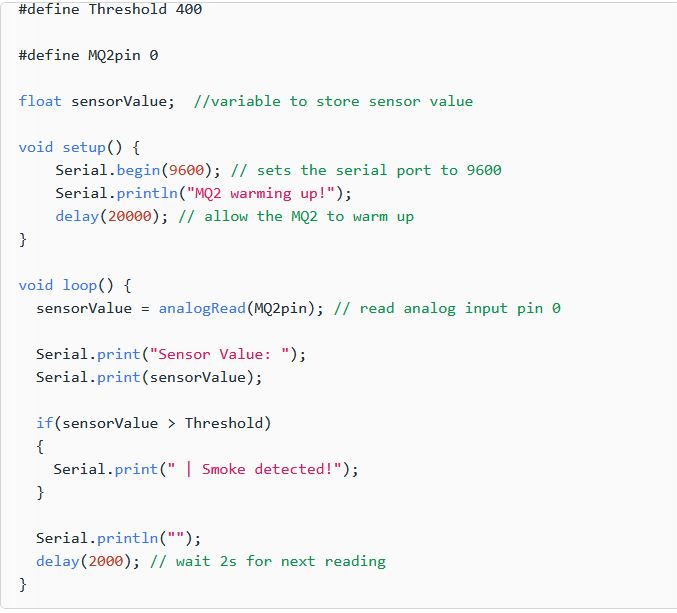
The code is also straight forward.
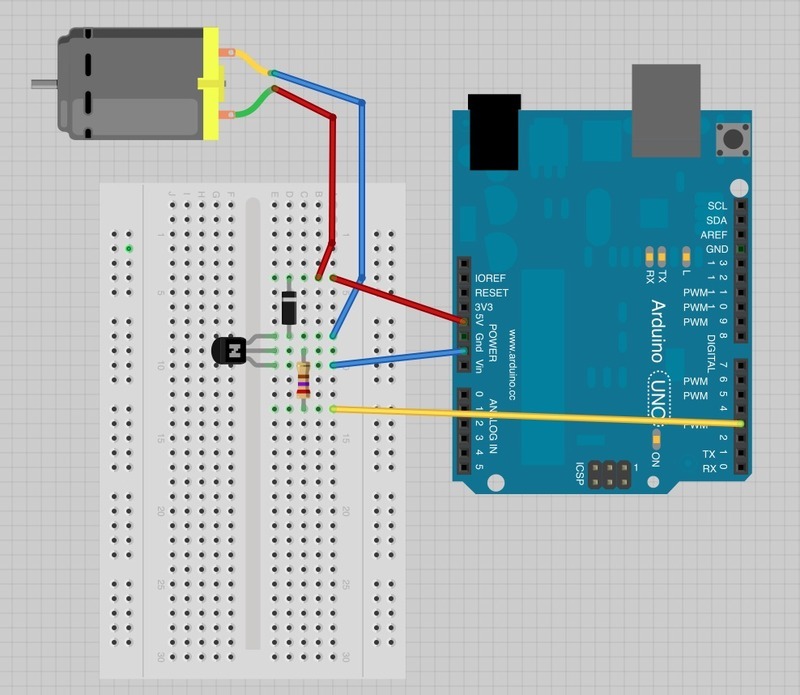
My Project:
For my project I created a device that would detect gas can turn on a fan that would blow away the gasses. I used the fan blade attached to the DC Motor to achieve this. I used to digital output for the final version of my project, but the motor can also do analog.
If you want some information on the DC motor, these sites helped me
- https://www.tutorialspoint.com/arduino/arduino_dc_motor.htm
- https://learn.adafruit.com/adafruit-arduino-lesson-13-dc-motors?view=all
My Code:
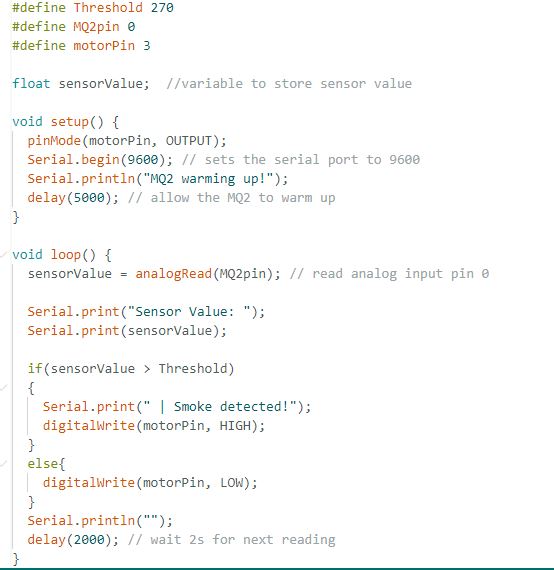
It is quite simple. I just added the few lines of code for the motor into the code I found for the MQ-J2 code.
Here is the video of my demo:
I will say that this sensor is very simple to use (wiring and coding), but it is a bit finicky. You can’t expect much from it, but get does get the job done. I do suggest playing around with the potentiometer to adjust the sensitivity of the sensor (I didn’t because it was working decent enough for this project). All and all, I do suggest this sensor for those looking for something on the easier side to implement.
If you want more information about the MQ-J2, I suggest these websites:
- https://lastminuteengineers.com/mq2-gas-senser-arduino-tutorial/
- https://circuitdigest.com/microcontroller-projects/interfacing-mq2-gas-sensor-with-arduino
- https://www.instructables.com/How-to-use-MQ2-Gas-Sensor-Arduino-Tutorial/
Leave a Reply