
In The Martian 2: Bit’s Journey, Matt Damon’s character Mark returns to Mars. While the rest of the crew has left their station to roam the planet, we have our first contact with life in outerspace: real martians. The martians kidnap the crew and hold them for ransom. Luckily, this time Mark is not alone when he gets separated from his crew. As a result of his last mission, Mark’s 8 year old son created a robot companion named Bit and sent him along with his dad in case he ever finds himself lonely. Bit can speak and responds to being pet by wagging his tail. Unfortunately, on lift off, Bit was not strapped down in the shuttle and received some serious damage from banging around in the ship, rendering him half-deaf. Even still, he makes a perfect companion for an otherwise alone Mark who must enter the martian’s ship and fight for his friends back. In the final act of the movie, the two friends share a heartbreaking, bitter sweet moment when a martian bullet meant for Mark instead hits Bit, saving Mark’s life. Bit’s sacrifice allows Mark to finish his mission bring his friends home.
Designing Bit
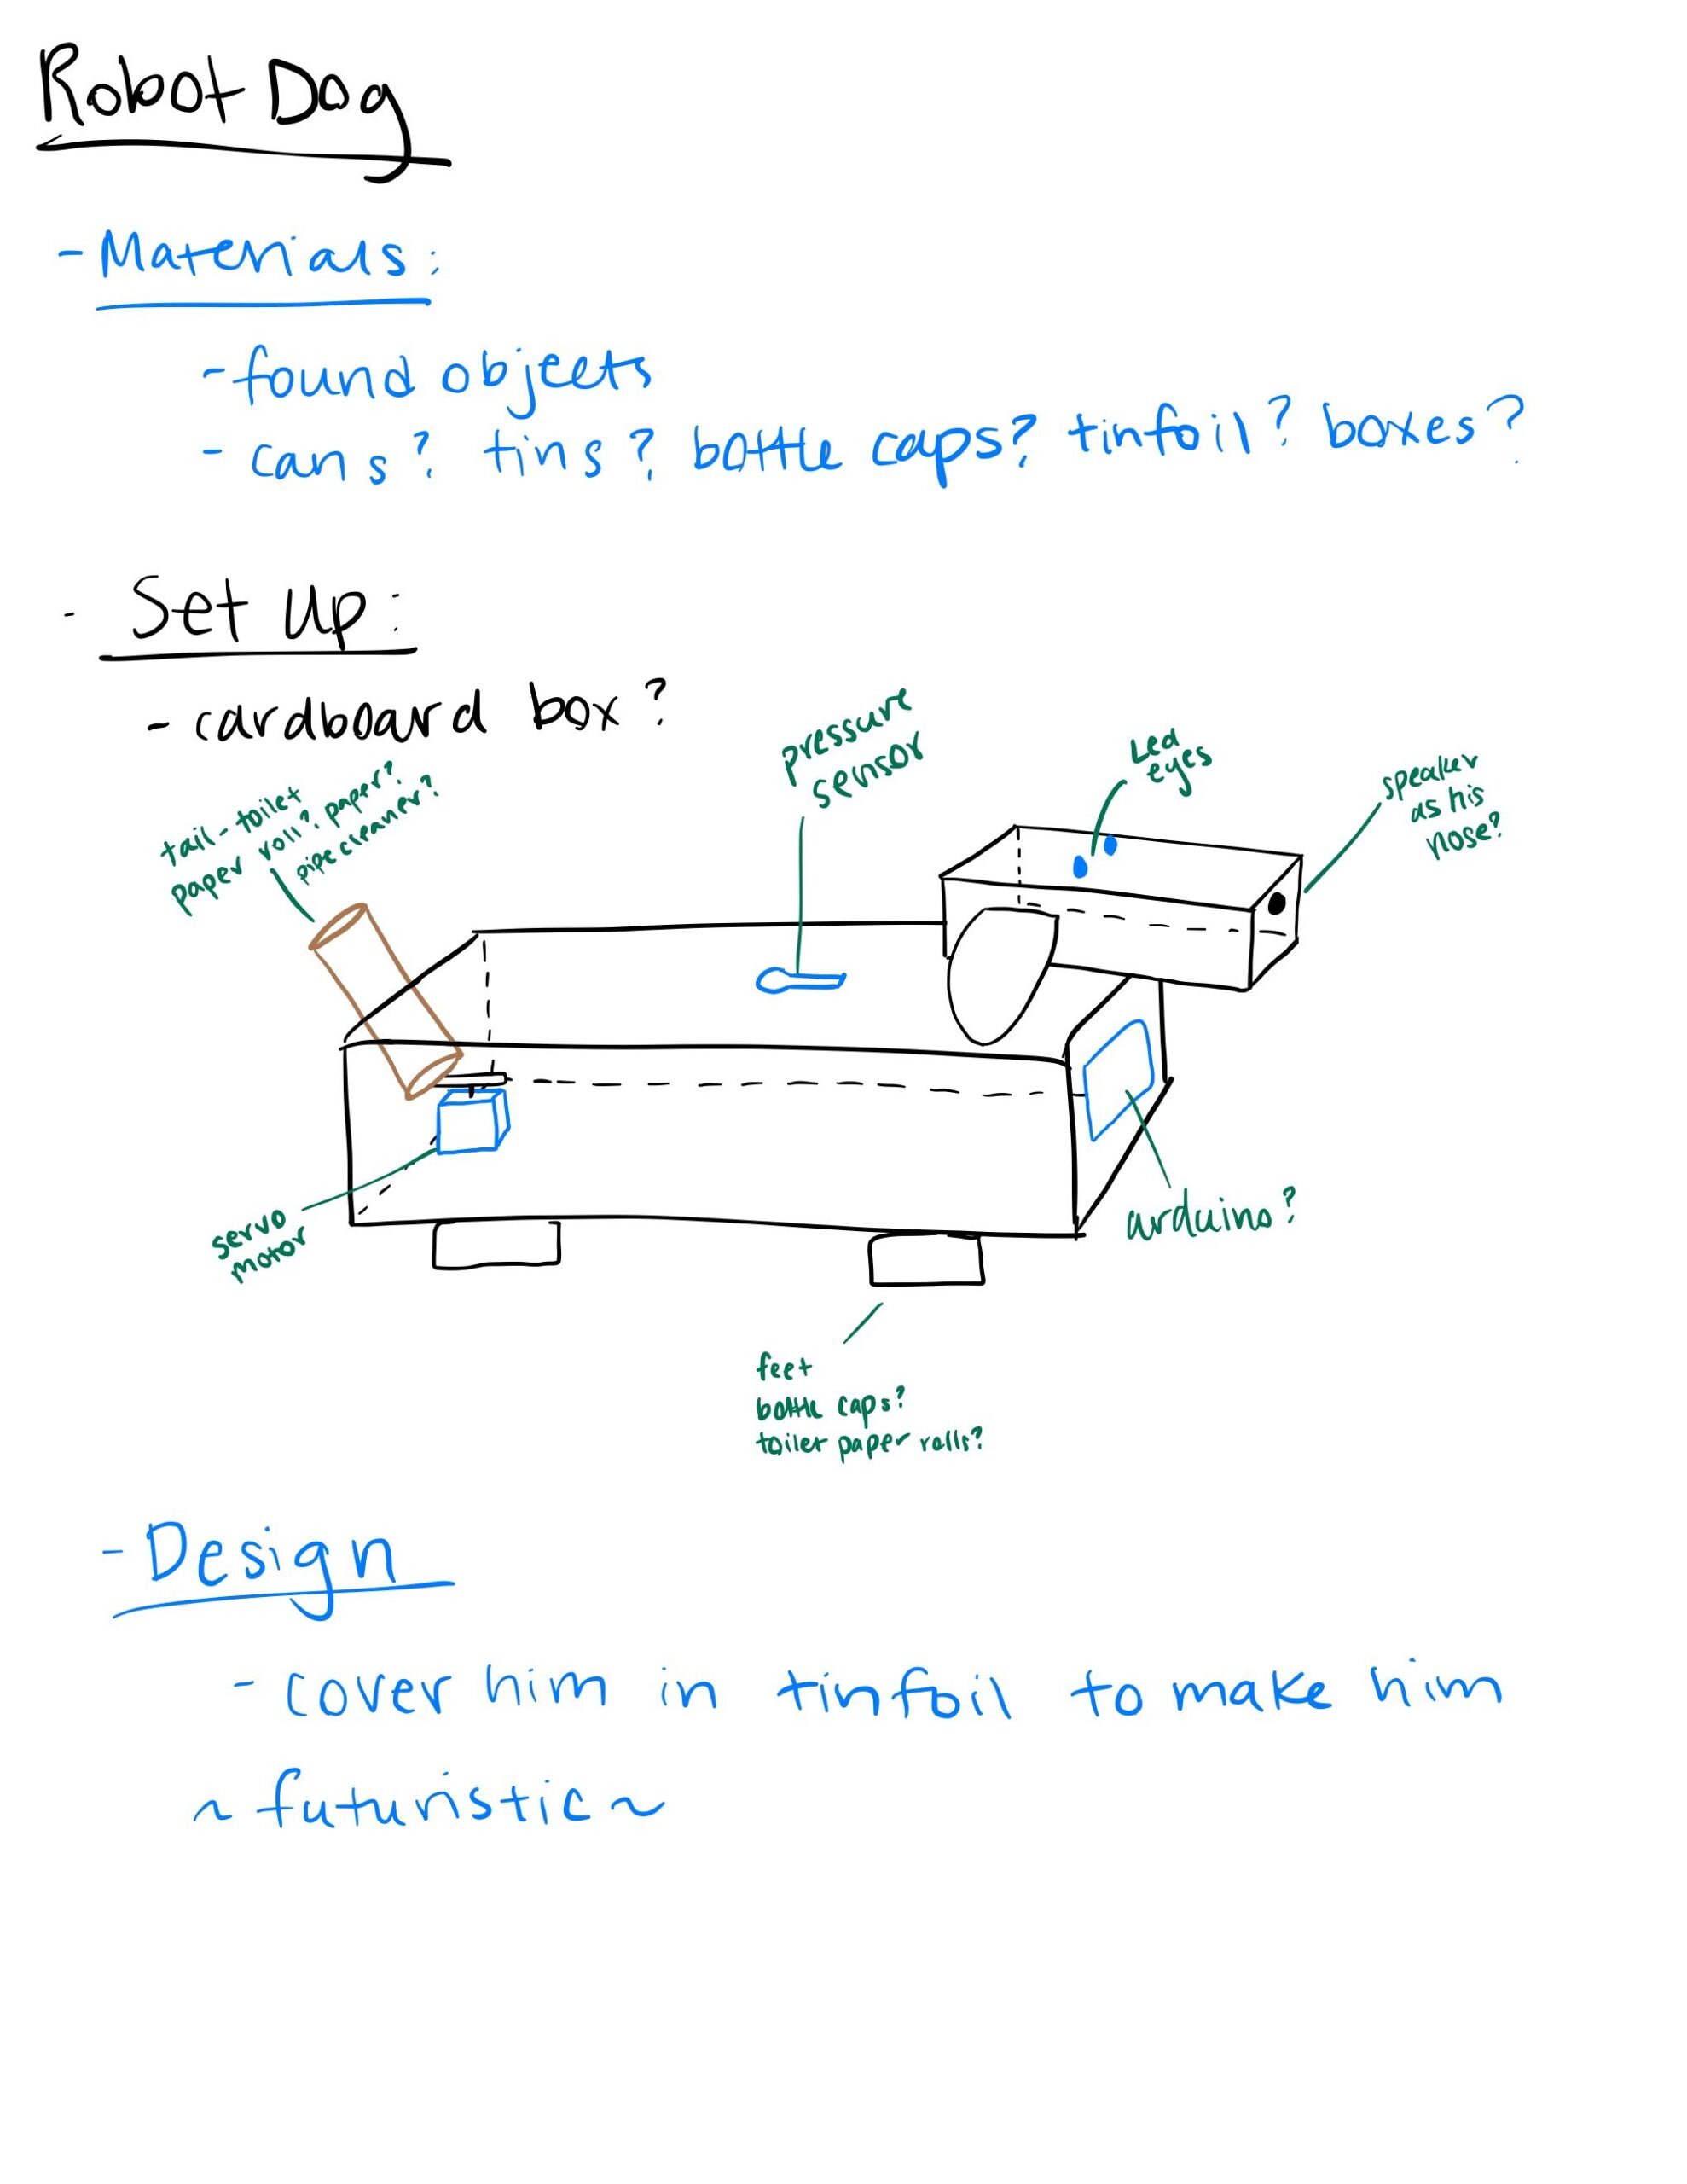
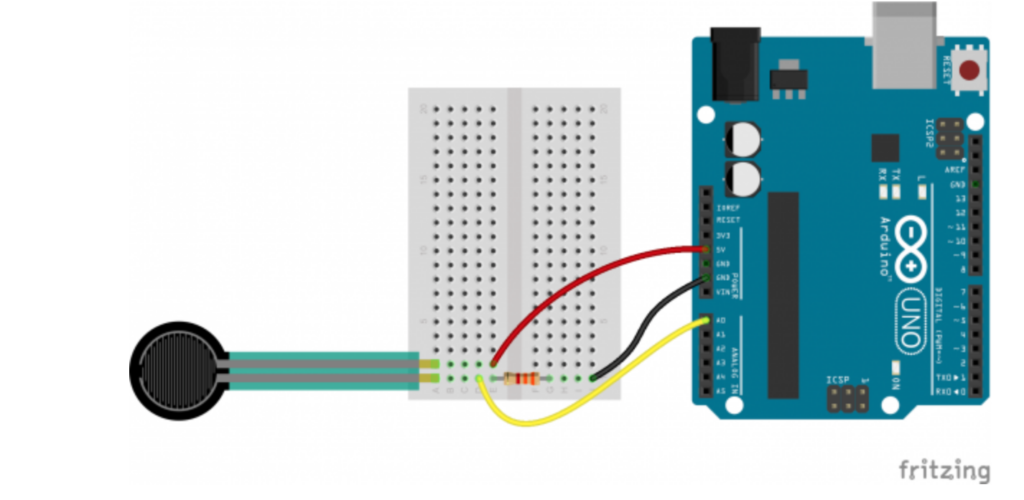
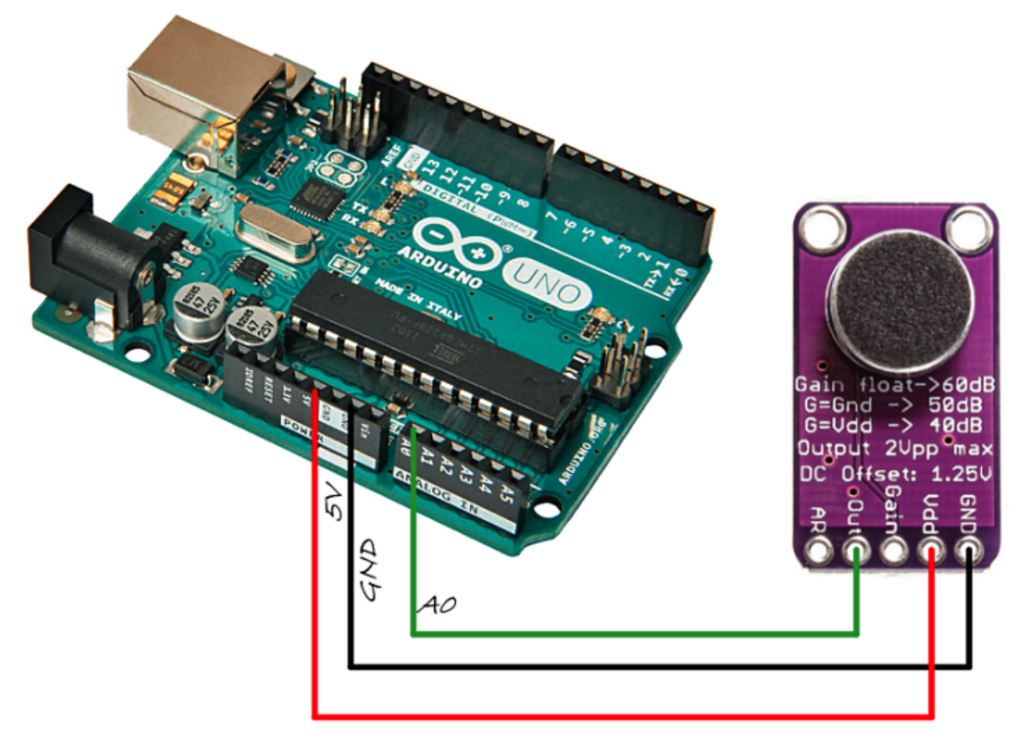
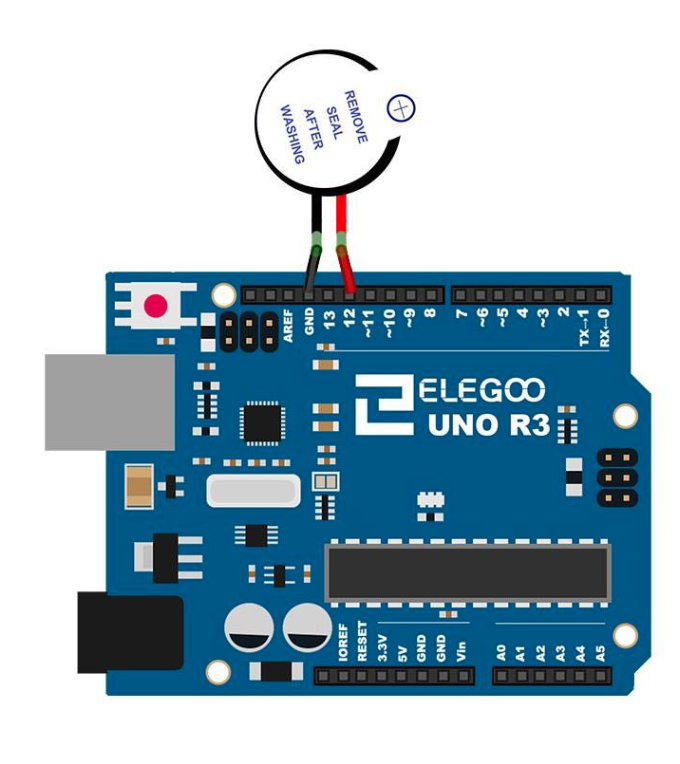
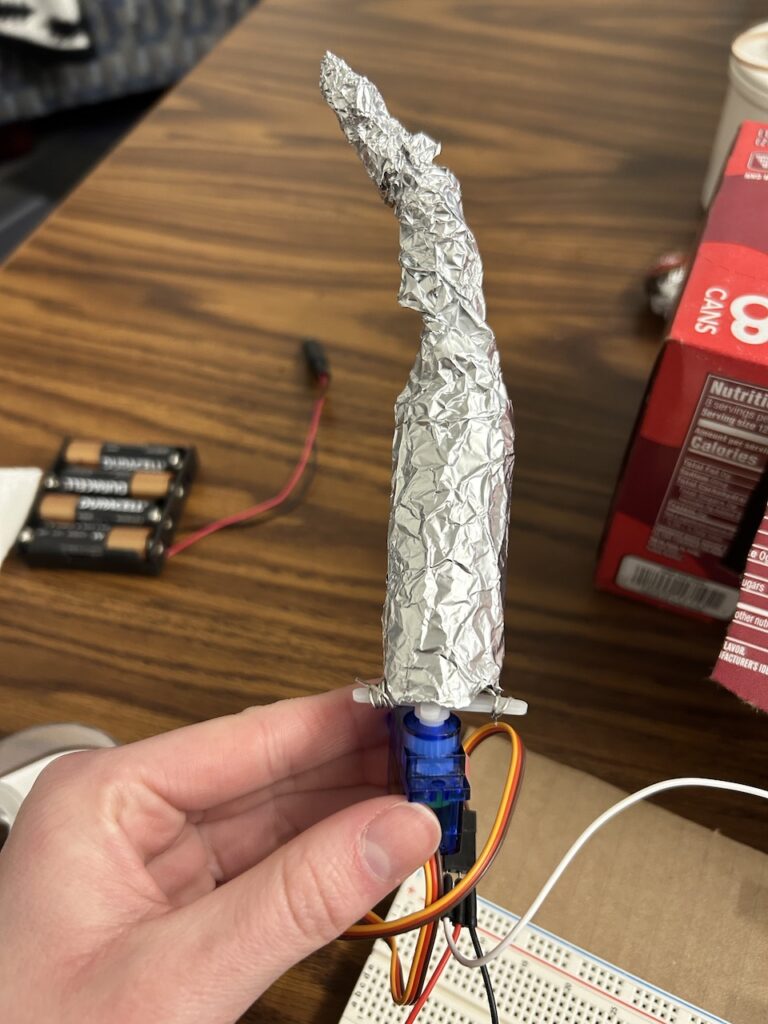
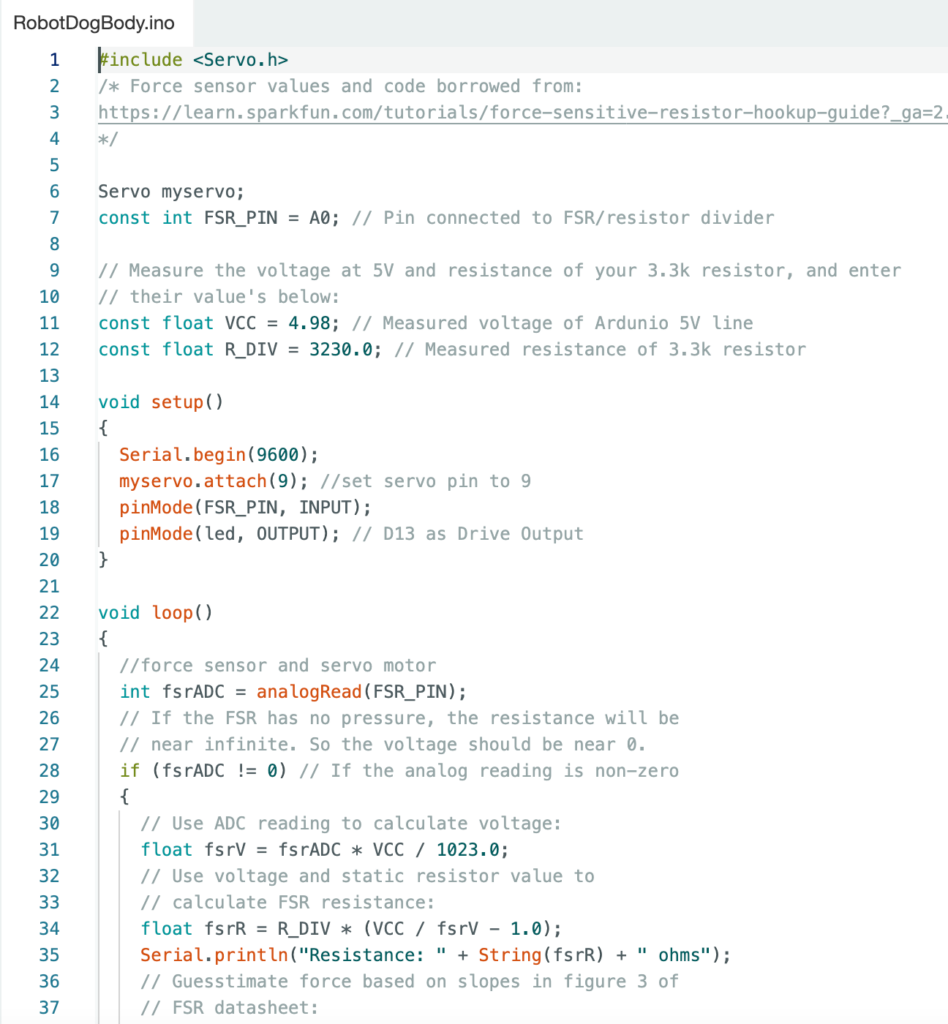
Because he is designed to bring companionship to the lonely, I wanted to design my dog to incorporate sensors that make you feel like you’re interacting with it like another living thing. I chose the force sensor to act as a “petting” sensor and chose the servo motor to move his tail bag and forth to show that he is happy. I also wanted you to be able to speak to him and hear a response back, so I chose a sound sensor to pick up on your voice and the buzzer to let him beep his response back to you. I also decided I wanted to use LEDs for his eyes to make him more robot-like.
Creating Bit
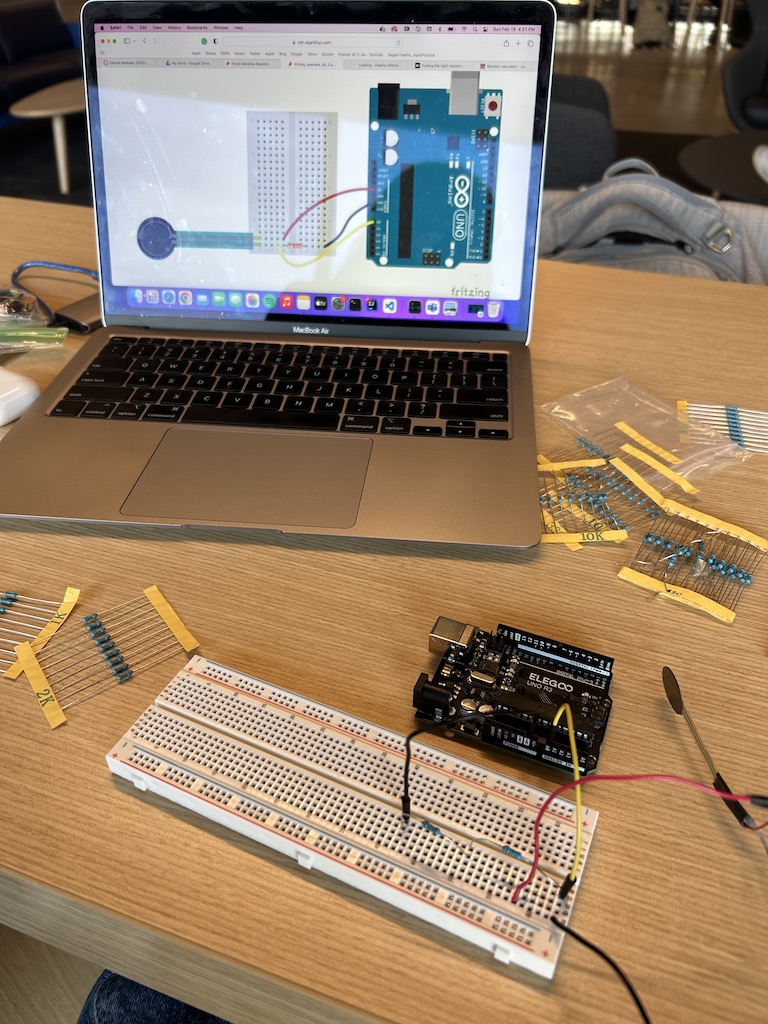
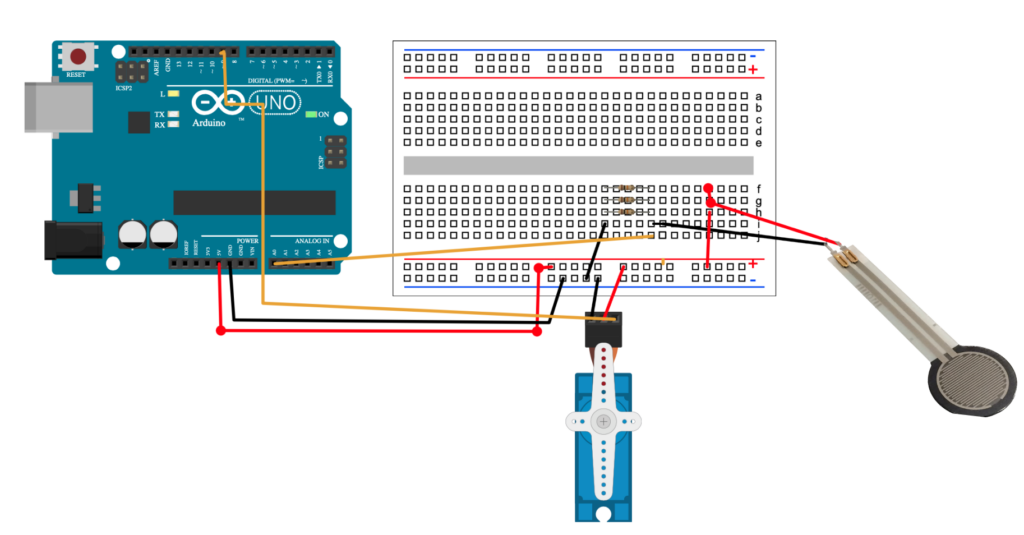
I followed the below schematics for the sound sensor, pressure sensor, buzzer, and servo motor.

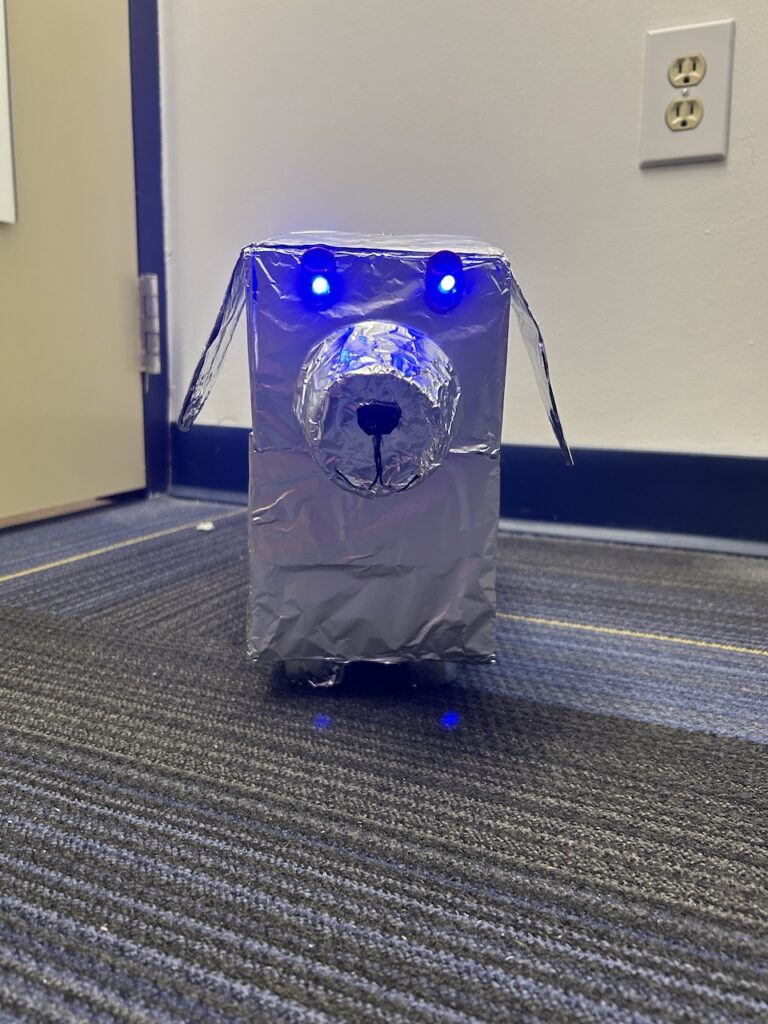
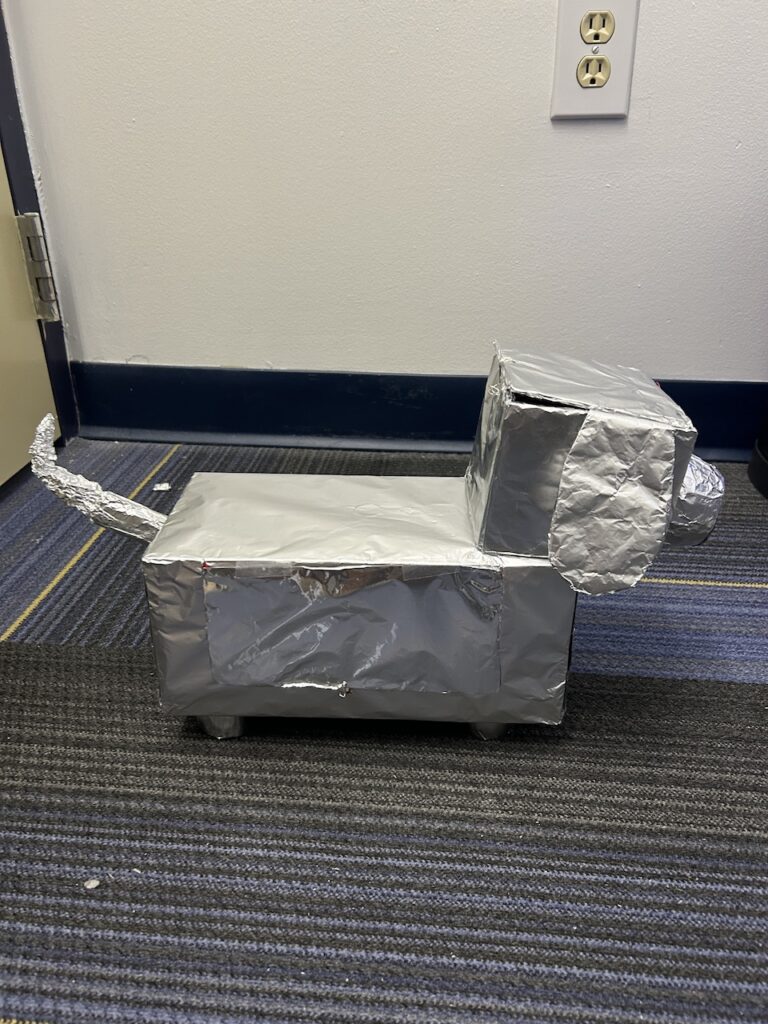
Bit’s structure is made out of 2 cardboard boxes for his body and head and several cut up paper towel rolls for his feet and tail. His nose is made out of an apple sauce cup. His whole body is covered in tinfoil to make him more robot-like. I used cardboard boxes to create his structure because I knew I needed to put my Arduino inside, and this was the best structure to hold it while being able to cut flaps that allow me to access the inside.
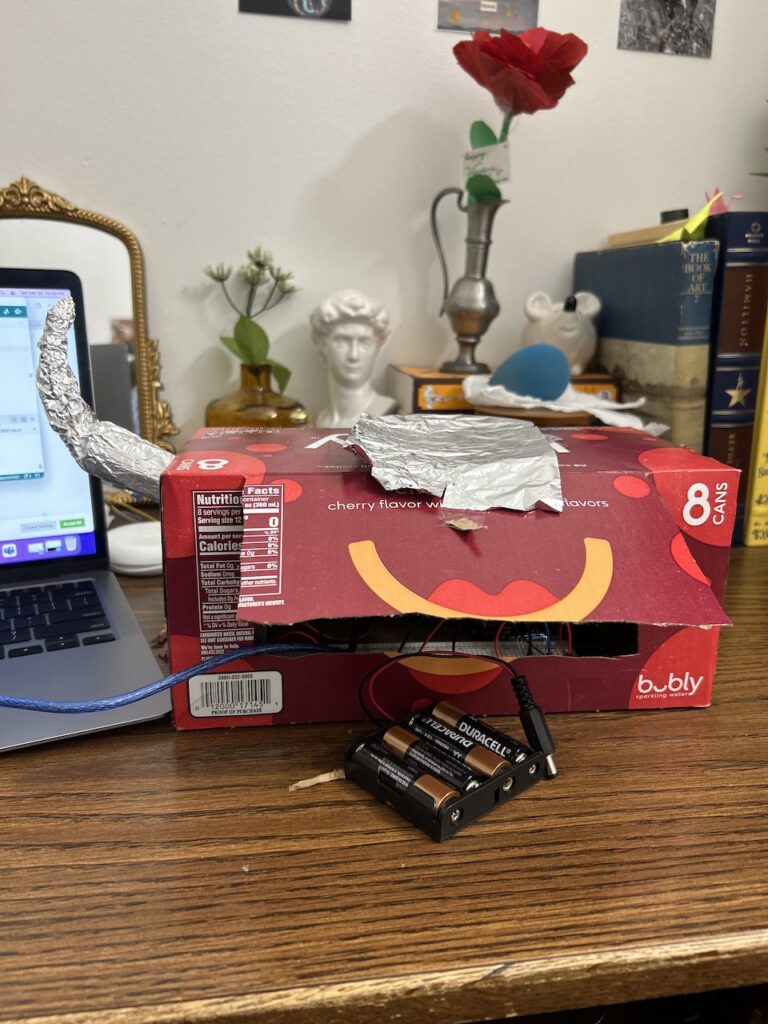
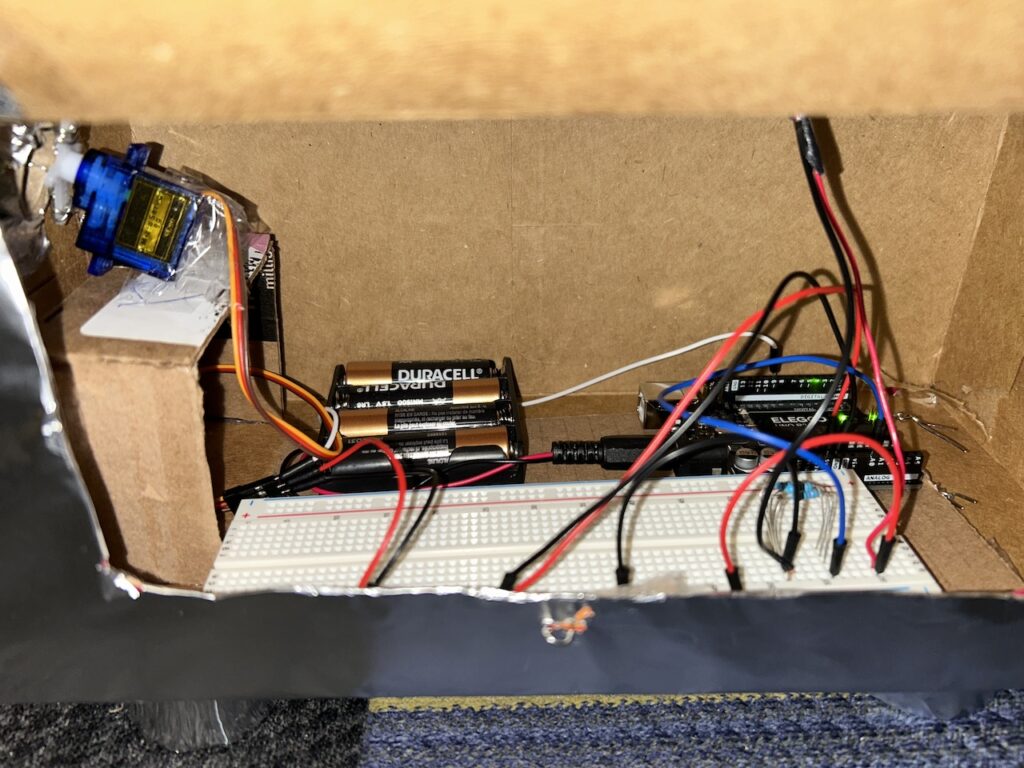
I ended up splitting Bit between 2 arduinos because I was originally worried about hooking everything up between the parts I wanted in his head and the parts I wanted in his body. Below you can see my final schematics and the setup inside of Bit.


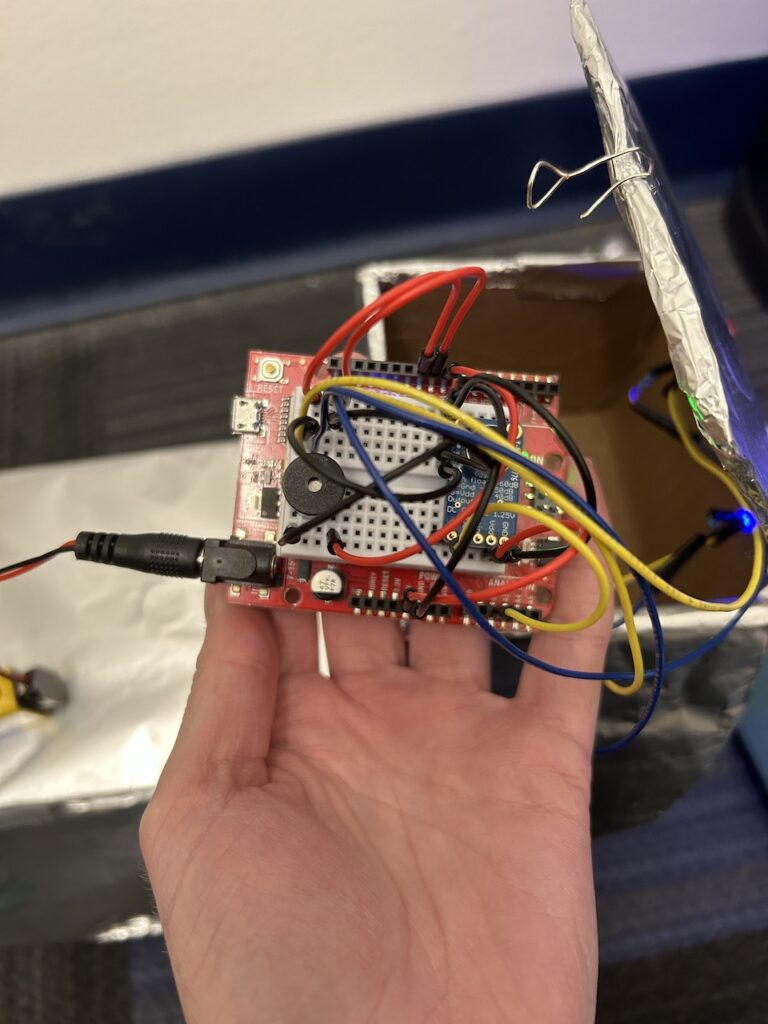
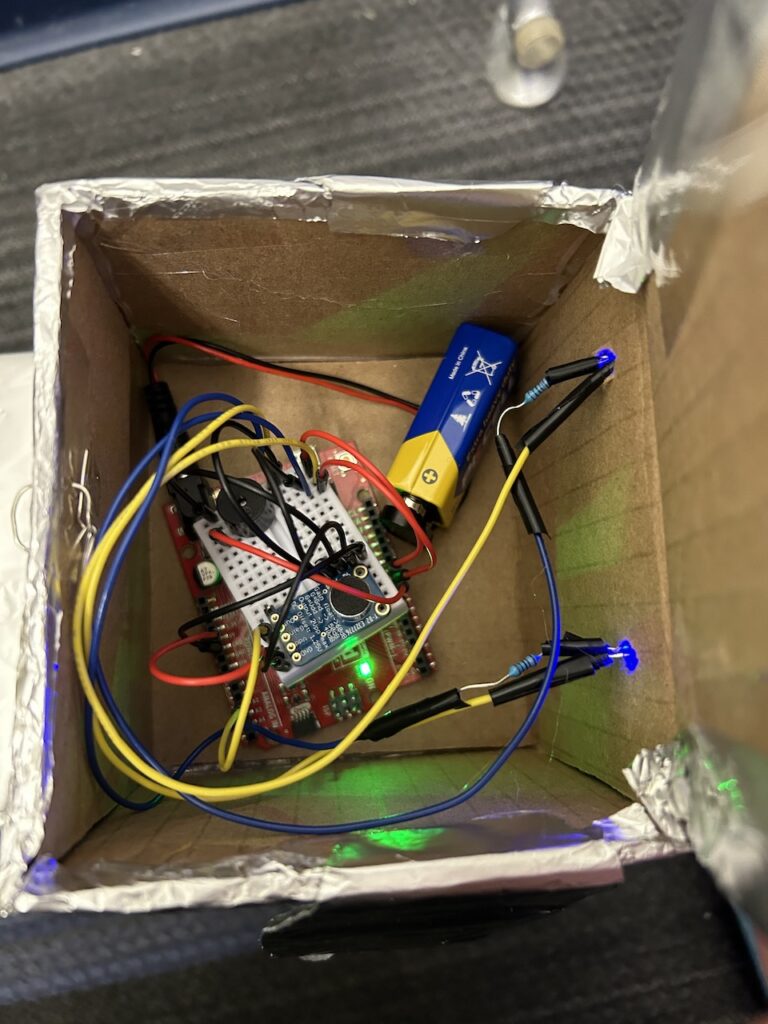
I soldered the two blue LEDs to some wire to be able to stick them out of the head to be his eyes.
Problems Encountered
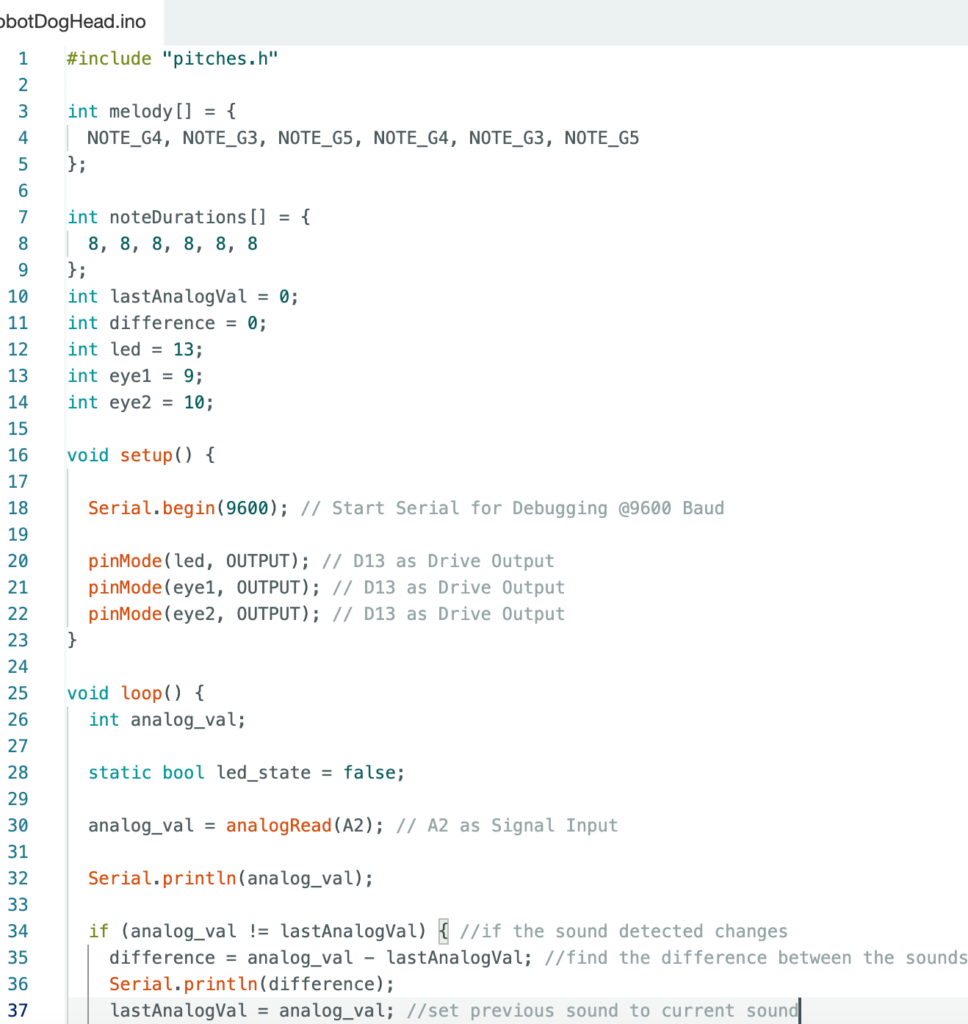
My main difficulty was getting the sound sensor to consistently work. It had inconsistent behavior between different rooms I took it into, so I didn’t want to code the response based on a certain sensor value threshold. Instead, I set it up to calculate the difference between the last sound sensed and the current sound sensed. If it increased by more than 5, it was supposed to make the robot beep and blink his eyes. However, the sensor was not sensitive at all to my voice, even if I shouted. It would go up by 1 or 2 values, but sometimes it would go up by 1 or 2 values even with no new sounds around it, so I couldn’t map the response to this change. Instead, I settled for making the dog pretty deaf and only being able to clap loudly to get it to work. The following is a video of me testing it to make sure it still worked when I put it inside his head.
The Finished Product


Leave a Reply