By: Hannah Wysocki, Austin Lindquist, Luke Walter
Overview
Our Weather Vending Machine is designed to provide you encouraging stickers based off the current weather and how you currently feel at the moment. Just 1 quarter is all that is required of you. Please do not ask for refunds!
How it Works
Insert the quarter from the top and choose from one of the three options based on how you feel. Watch as the chosen window opens up to reveal a sticker for you to enjoy. (Please undo the button as the machine resets, thank you)
Code:
#include <Stepper.h>
#include <Servo.h>
#include <DHT.h>

// Sensors
#define Cell A0
#define DHTPIN 13
#define UVpin 12

// Buttons
#define Left_Btn 5
#define Center_Btn 6
#define Right_Btn 7

// DHT Sensor
DHT dht(DHTPIN, DHT11);

// Stepper Moter
Stepper motor(2048, 8, 10, 9, 11);
int speed = 10;
int steps = 2048;

// Servo Motors
Servo Right; //170
Servo Center; // 10
Servo Left; // 8


// SETUP
void setup() {

  // Stepper Motor
  motor.setSpeed(speed);

  // Servo Motors
  Left.attach(2);
  Center.attach(3);
  Right.attach(4);

  // Switch Buttons
  pinMode(Left_Btn, INPUT);
  pinMode(Center_Btn, INPUT);
  pinMode(Right_Btn, INPUT);

  Serial.begin(9600);

  // Sensors
  pinMode(Cell, INPUT);
  pinMode(UVpin, INPUT);
  dht.begin();
}


// LOOP
void loop() {

  // Servo Maintenance
  Left.write(13);
  Center.write(11);
  Right.write(170);

  // NEW CUSTOMER
  if (analogRead(Cell) < 600) {

    // Humidity
    float humi = dht.readHumidity();

    // UV Reading
    int UVreading = analogRead(UVpin);
    int UVindex = UVreading * (5.0/102.4);

    // Calculate + Rotate
    int returnSteps;
    if (UVindex < 5 && humi > 80){
      Serial.println("\nRAINING");
      motor.step(steps / 4);
      returnSteps = -steps / 4;
    } else if (UVindex < 5) {
      Serial.println("\nCLOUDY");
      motor.step(steps / 2);
      returnSteps = -steps / 2;
    } else if (UVindex > 5) {
      Serial.println("\nSUNNY");
      motor.step(-steps / 4);
      returnSteps = -steps / 4;
    }

    // Wait For Choice
    while (true) {

      // Left Button Reader
      if (digitalRead(Left_Btn) == LOW) {
        delay(1000);
        Left.write(180);
        delay(10000);
        Left.write(13);
        break;
      } else {
        Left.write(13);
      }

      // Center Button Reader
      if (digitalRead(Center_Btn) == LOW) {
        delay(1000);
        Center.write(180);
        delay(10000);
        Center.write(11);
        break;
      } else {
        Center.write(11);
      }

      // Right Button Reader
      if (digitalRead(Right_Btn) == LOW) {
        delay(1000);
        Right.write(0);
        delay(10000);
        Right.write(170);
        break;
      } else {
        Right.write(170);
      }

    }
    motor.step(returnSteps);
  }
}
Design
This project has undergone many designs before its initial implementation. We started out thinking about which sensors and inputs to use and how to disperse the stickers.
Original Ideas:
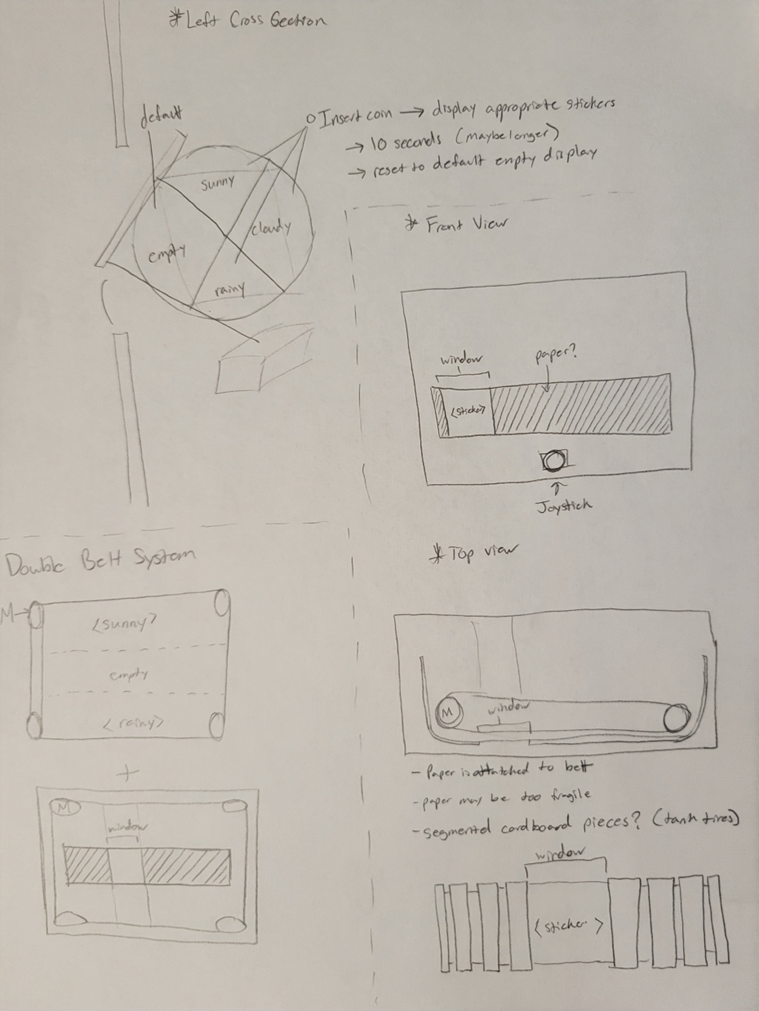
We thought about using a curtain that would be manipulated by a pully system for showing the user’s choice, instead of the now current window system. The user would control the curtain using a joystick to either move the open slot to the left or right. This was scratched for the now more simplified and reasonable window system.
The sensors we ended using were:
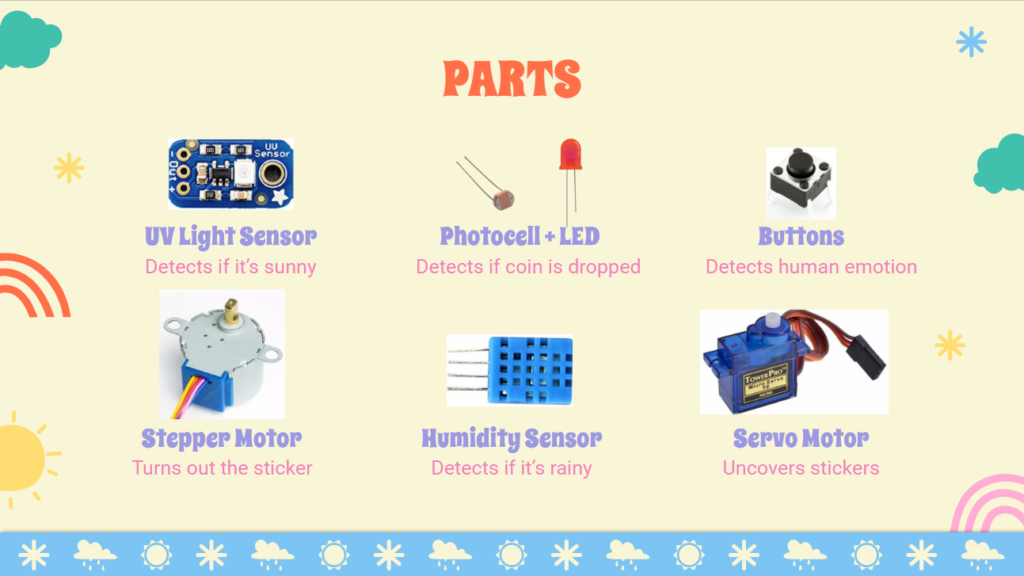
Using the UV Light Sensor and Humidity Sensor, we were able to take in information about the current weather and use that information to provide respective stickers. For detecting a coin insertion, we created our own sensor using a Photocell and LED light. As for turning the rectangular prism, we used a stepper motor. For opening and closing the windows, we use 3 servo motors, each being activated by 3 separate buttons.
Individual Mechanisms
Coin Drop

The coin drop was designed using LEGO Technic parts along with the mentioned Photocell + LED sensor that we made. As you insert the coin from the top, it will roll down and pass between the Photocell and LED, which will send a single to the Arduino to take in the calculate the current weather.
Window System

The windows are manipulated by servo motors, which when the button underneath it is press will open it, after, of course, you provided the 25 cent service fee. After 10 seconds of being opened, they will return back to their closed positions.
Rotating Choices
The choices are laid out accordingly where each face of the blue rectangular prism is associated with a different type of weather (sunny, rainy, cloudy) with only one of them being the default/blank where the system stays at before being used. When the coin is detected, the two weather sensors (Humidity + UV) will be taken in by the Arduino to calculated the perceived weather. After, it would all the stepper motor to rotate to the respective face to be shown when the user goes to choose their mood.
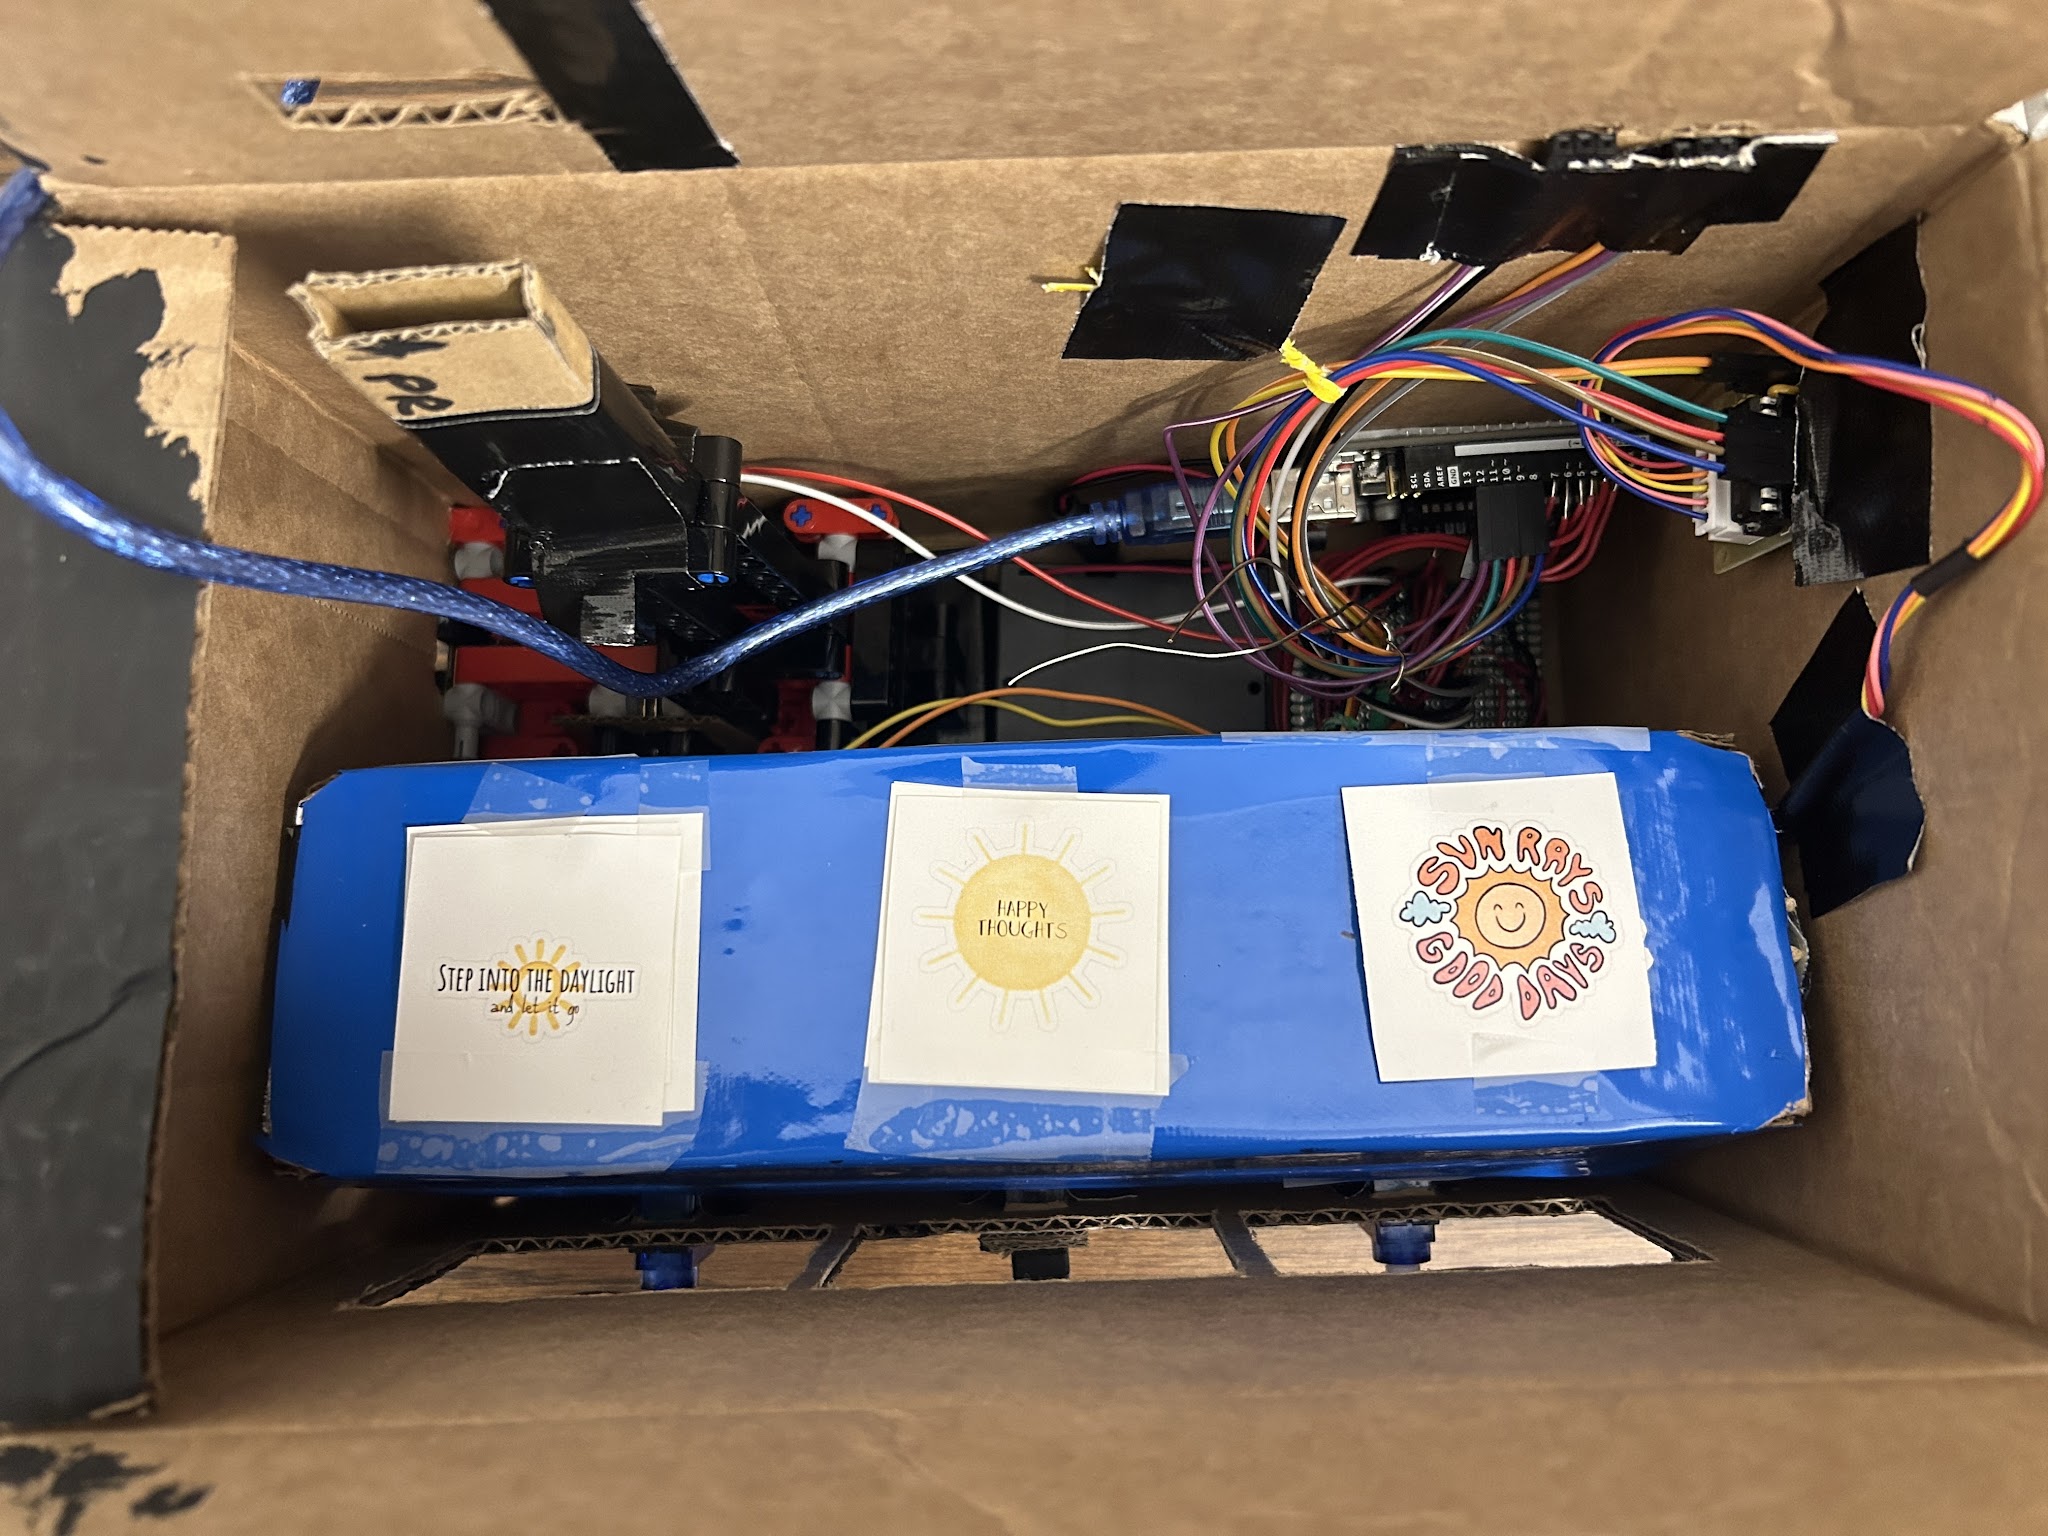
Protoboard


We decided to use a protoboard to help make up for the lack of space inside the box. We went to the invention studio to solder it together after designing a layout based off our breadboard layouts.
Stickers


Rainy Stickers


Cloudy Stickers


Sunny Stickers
Video Links
Sunny Video: https://drive.google.com/file/d/14vitXhAlIrtwFaOGxUgC72K73ZLrFHOB/view?usp=share_link
Cloudy Video: https://drive.google.com/file/d/1XgayximTPbSc6w5R5AA496zDsUyy5Z4U/view?usp=share_link
Rainy Video: https://drive.google.com/file/d/1Xy8VJclKmRmo22ZhoQAZLOye5u16Jty5/view?usp=share_link
Leave a Reply