Final Project by Mitchell Philipp, Colton Hazelton, Dhruv Kulkarni
Project Purpose
We sought to create a device that would detect a cat and then with user interaction dispense treats and display information on the whereabouts of the stray cat behind School of Construction building on Georgia Tech’s campus.

The main idea is a user walks up to the dispenser box and sees on the display that the cat has recently been there. The box knows this as there is a second box wirelessly telling the dispenser box if the cat has been there recently. The user then will be prompted to press a button to dispense a treat and can either feed the cat or leave it out for the cat to eat.
Material Requirements
We will need a list of arduino parts and other items to accomplish the goal.
Parts:
- 2 Arduino – One for motion sensor, one for display
- A LCD Screen – Display when most cat was most recently seen, and when likely to be seen
- A Servo – Dispenser for cat treats, triggered by a button
- 2 Buttons – Used for interaction with the box
- A Motion Sensor – HC-SR501, Used to detect cat when it is near
- 2 Bluetooth modules – HC-05, Used for communication between the 2 boxes
- 2 boxes – Used to hold all the electronics
Prototyping – Stage One
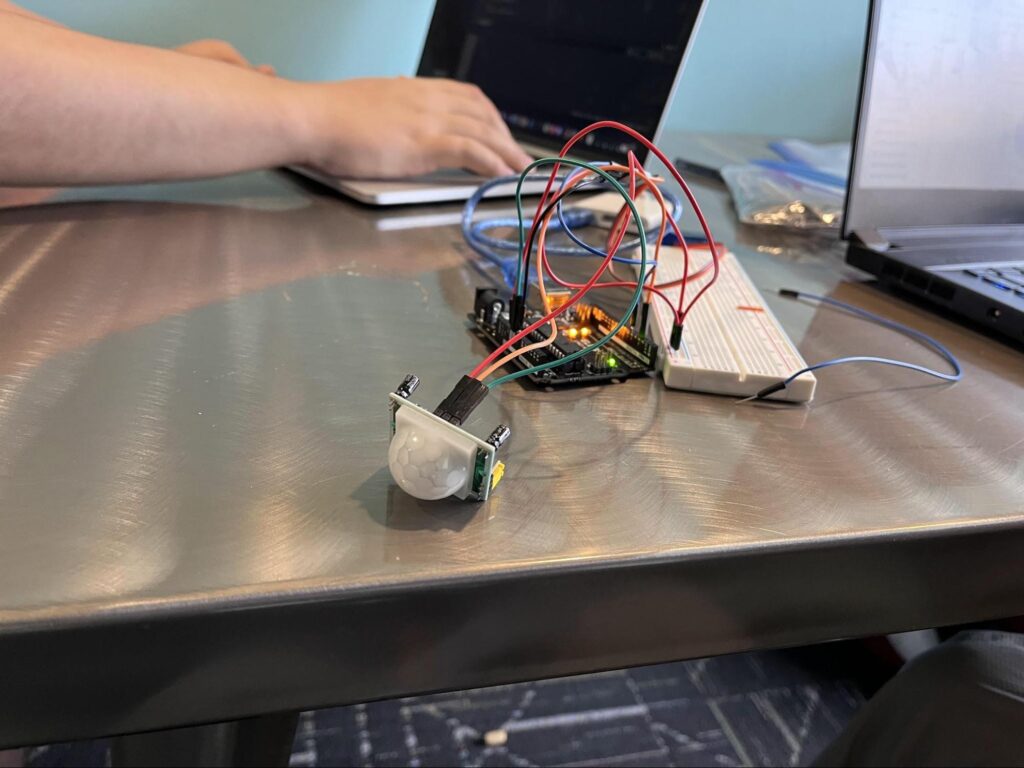
The set of devices went through many iterations of design for creating our final product. Our initial prototype was very simple and rough in creation. It used the IR motion sensor to detect movement and then with a press of a button, the servo connected would move.
This early version allowed us to test how the motion sensor itself works. It has two small potentiometers built into its base, which control its sensitivity and the delay time after a detection. In practice we would want both of these to be medium in length, but for ease of testing we set both of them low.
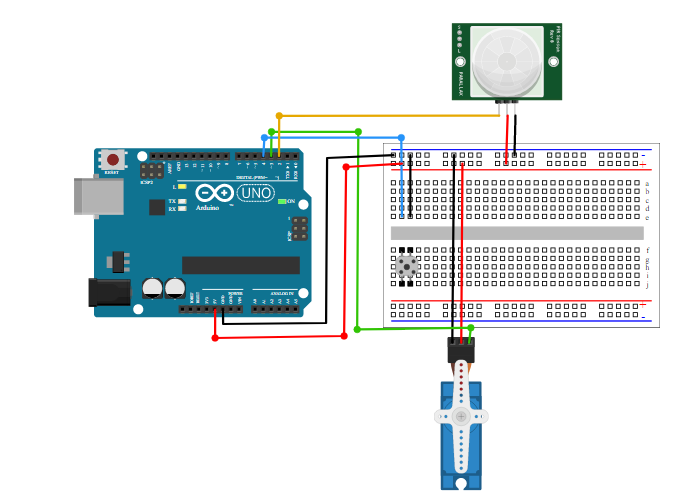
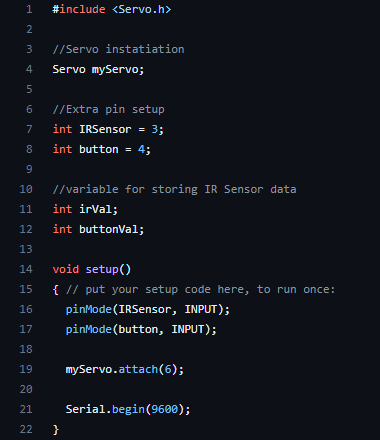
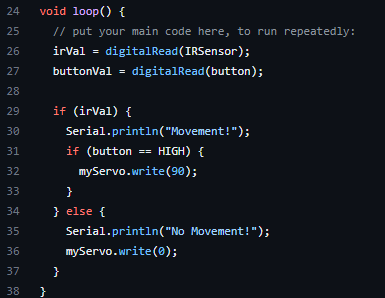
The code is just as simple as the setup. First, we set initialize all our pins along with some variables for storing values with the IR sensor and the button. Next, in the setup() method we tell the arduino to recognize the pins as inputs and initialize our servo to pin number 6. Lastly, we open our port for display on the Serial Monitor. Within the loop() method, we set values to the previously instantiated variables. Afterwards, we check if there was movement detected and if someone pressed the button, we move the servo 90 degrees. If there is no movement, we move the servo back to the base position.
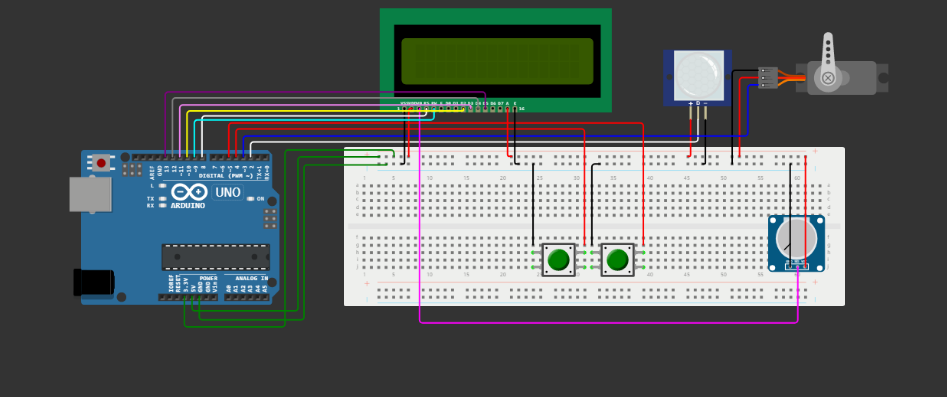
Prototyping – Stage Two
Our next step is to get all our parts working that would be needed for the finished product, except our bluetooth modules.
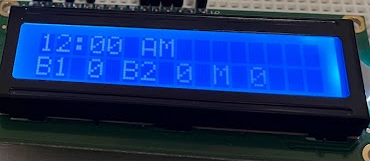
Setting up the LCD screen is easy enough, as we’ve all used them before. If we want show actual timestamps for the last time the cat has been seen, we need some way to let the arduino know the actual time. We decided on having the lcd display a time selector at boot, where one button would increment the current digit, and the other would move to the next digit. Once the last digit is entered, the time displayed is logged as the current time, using the helpful Time library, which includes features for setting the time, as well as converting millis() calls into a UTC timestamp.
Once the time is entered, normal function begins. The Arduino tracks a list of detections with start and end timestamps, reading the motion sensor to detect the cat moving nearby. If the cat is currently detected, or the last time it was detected is under 5 minutes ago, pressing either of the buttons triggers the servo to open the dispenser and release a treat. The LCD displays the last time the cat was seen, as well as prompting the viewer to press a button when treats are available.
The code for this version is too long to include here, but it can be found at https://github.com/MGPAlpha/cat-detect/blob/e643cfafba5add52e64c8e2be377555d1737b2d3/cat-detect.ino
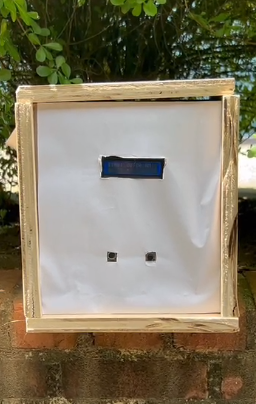
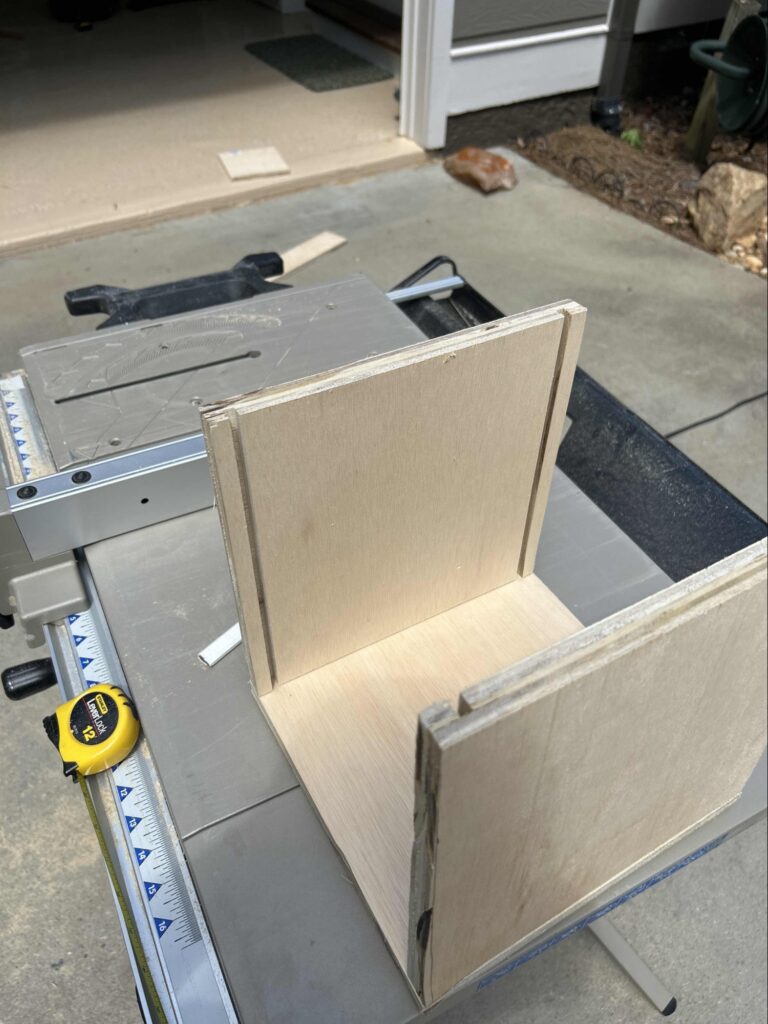
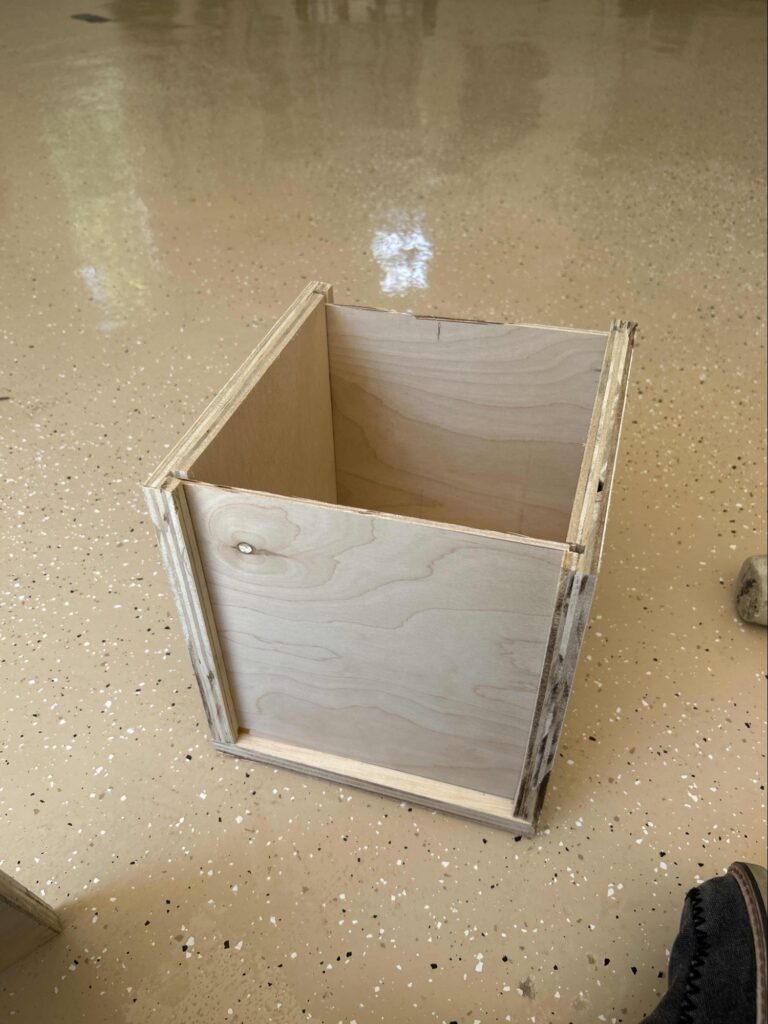
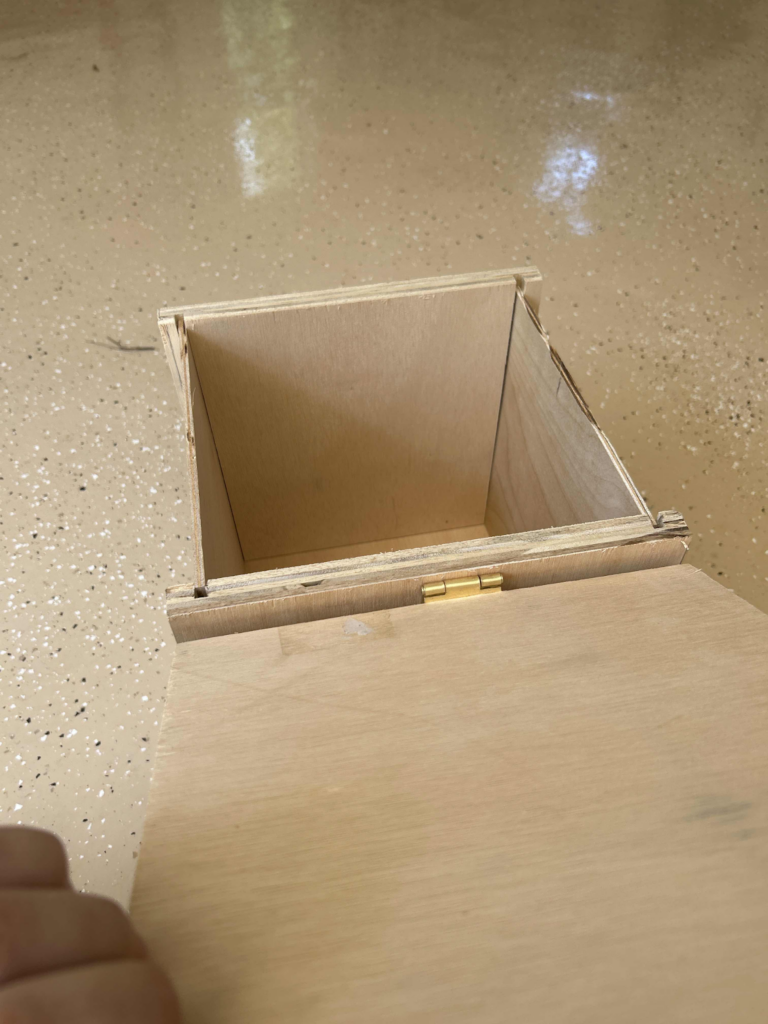
Device Housing
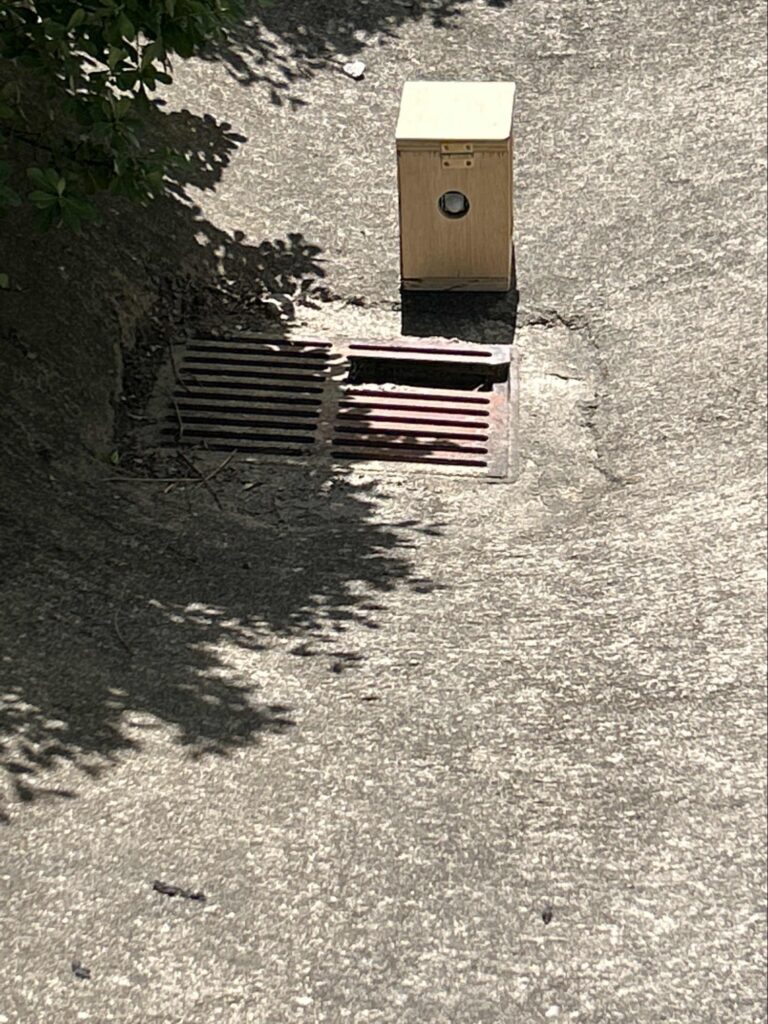
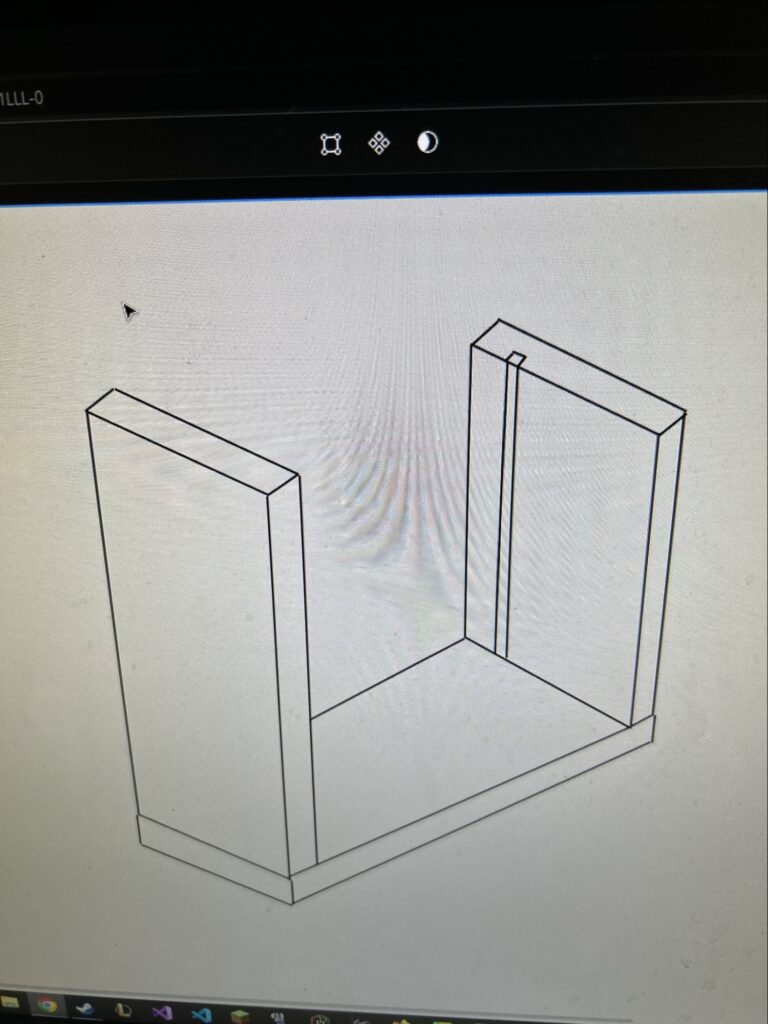
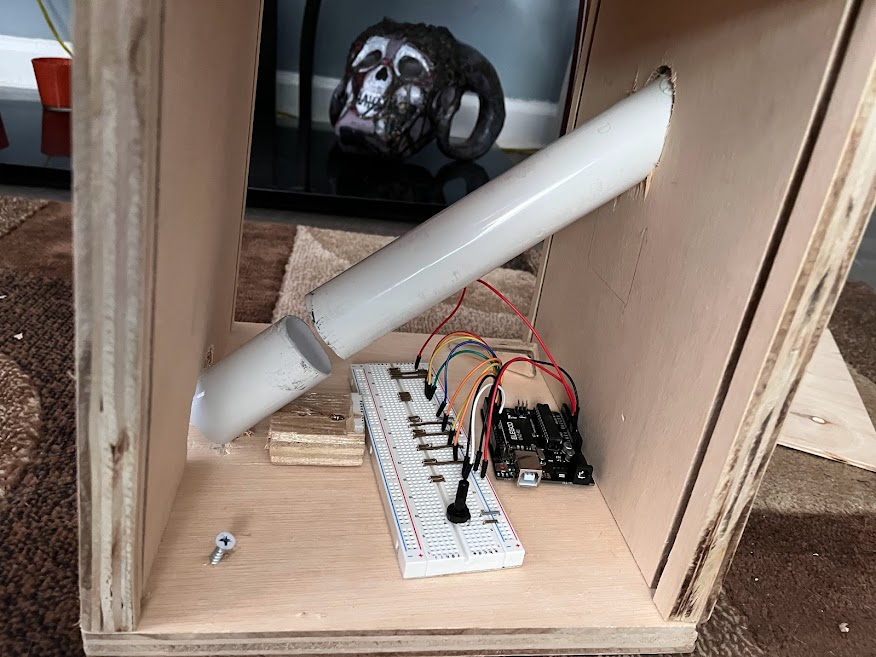
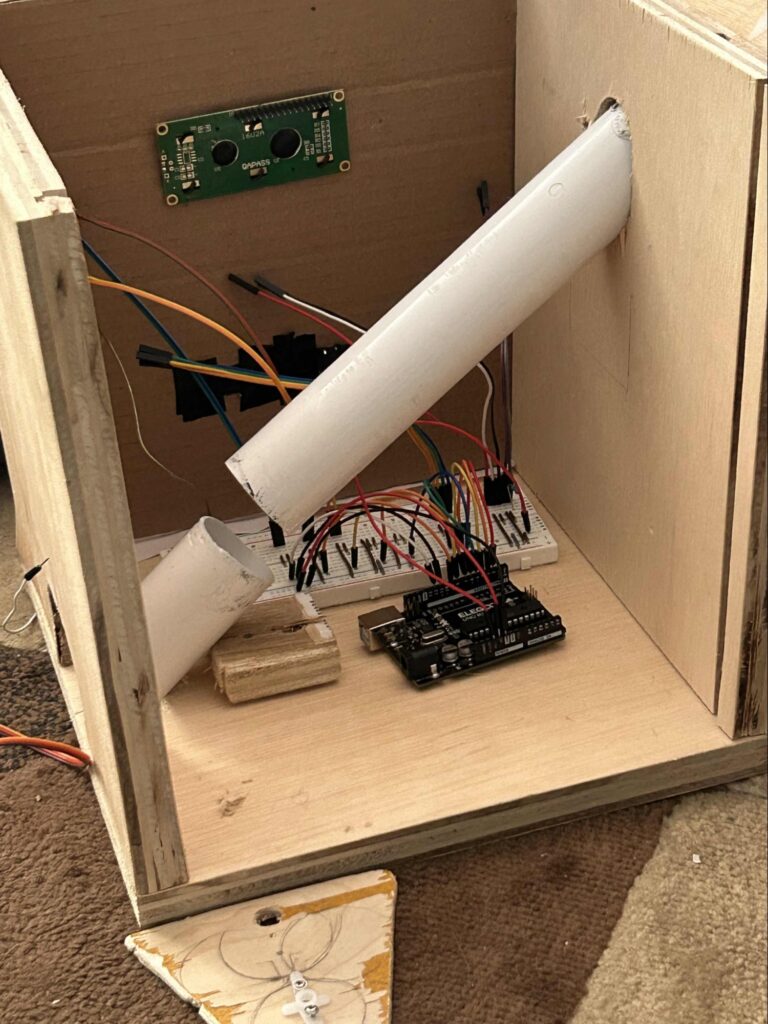
To contain the main device, we constructed a wooden box with a hinged lid and sides that can be slid out to allow easy access to the internals. The electronics are mounted inside the box, along with the dispenser mechanism constructed out of PVC pipe. The box has a hole to allow wires connecting to an external motion sensor module. One of the sides insertable sides of the box has an image of the cat laser-engraved on it. The motion sensor is housed in a similarly constructed but smaller box, and is connected by a long bundle of 3 wires connecting to the leads of the sensor.
Going Wireless with Bluetooth
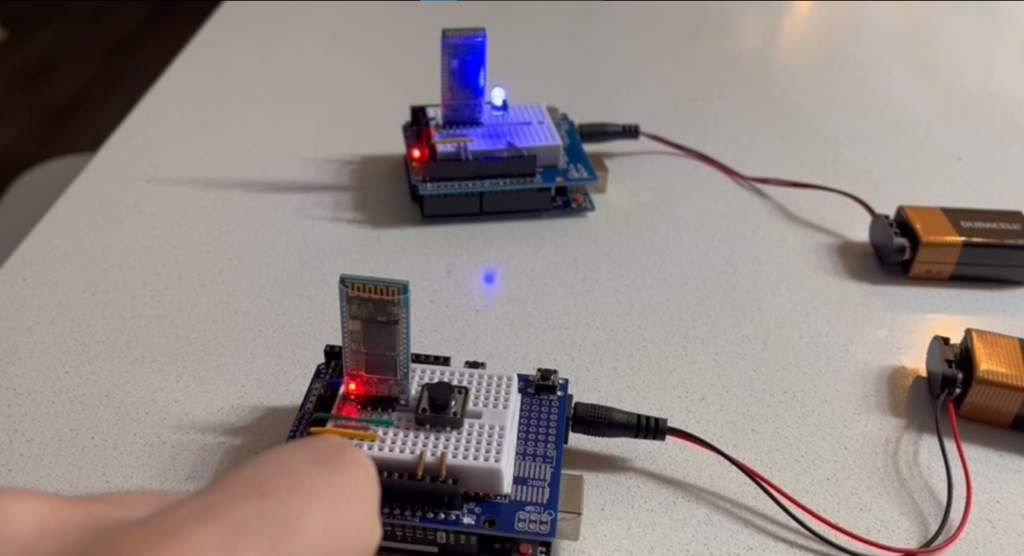
While the wired connection between the main unit and the sensor module worked, it was unwieldy to deal with. The connection itself was fragile, and it significantly limited the distance we could put between the sensor and the display unity. For these reasons we decided to try using a bluetooth connection between the boxes instead. This would mean adding another Arduino into the sensor box, but it would allow us to have a much cleaner setup between the boxes.
We bought two bluetooth modules, the HC05 and HC06. The HC06 is slave-mode only, meaning it can only be connected to by another device. It could not connect to another HC06. HC05, however, can be configured in master or slave mode, allowing it to choose another bluetooth module to connect to. These modules operate basically as a wireless serial connection, allowing a read/write connection to work the same way as a connection over the arduino’s USB port. The modules are also configured using a serial connection. Sending commands over the serial starting with “AT” while the module is not connected allows us to configure the settings of the modules, including name, connection mode, and preferred connection address. With the proper configuration, we could make the modules connect to each other automatically as soon as they boot up. Once they’re connected, they can send serial communication the same as a regular serial connection.
We tested the bluetooth with a separate setup of one arduino reading a button and sending it over serial, and another arduino reading the serial connection and using it to light an LED, which worked quite well.
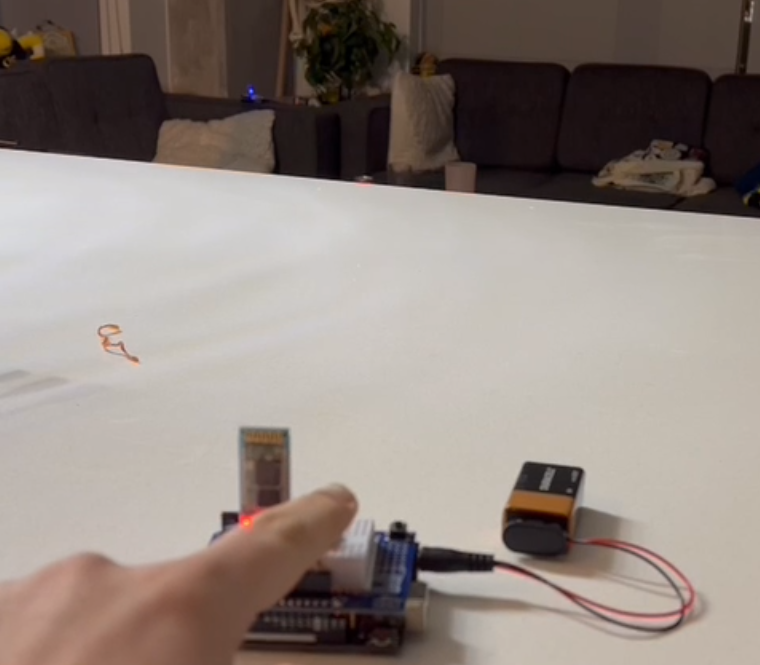
With bluetooth confirmed to work, we placed an arduino with an HC06 in the sensor housing and added an HC05 to the main arduino. We also modified the code to add a bluetooth option at compile time, which would switch to reading from serial instead of directly from a sensor.
The bluetooth worked as expected, but introduced a strange new glitch. Whenever the bluetooth module was connected, the dispenser’s servo motor would start to fidget seemingly at random. It took us quite a while to figure out why, as we originally thought it must be a problem with the servo’s connection or with our code controlling it. As it turns out though, the problem was an incompatibility between two arduino libraries.
We were using the SoftwareSerial library to control our bluetooth chip on pins other than 0 & 1 so as to allow us to use the regular serial channel for debugging. As it turns out though, the SoftwareSerial library uses one of the arduino’s hardware timers to control the timing of data flow, and the Servo library uses the same timer to control the servo. As a result, these two libraries were interfering with each other, and causing the timing for the servo to go wrong.
We ended up fixing the problem by switching the bluetooth chip to use the regular 0 & 1 serial pins, but it had some unfortunate side effects. We can no longer use the serial connection for debug, as it would interfere with the bluetooth. Additionally, attempting to upload a new version of the code via the USB fails, as it uses the serial connection to do so. To upload, we have to make sure the other bluetooth module is turned off, so uploading isn’t interrupted by serial activity from the connection.
In the end though, the bluetooth does still work, so it turned out alright.
Improvements


There are a few features we wish we could have implemented, but didn’t have either the time or the resources:
- Animations – We were hoping to have a small animated cat show on the LCD screen, indicating the current status in a cute and approachable way. Unfortunately, although we attempted to implement this, it didn’t work and we didn’t have enough time to troubleshoot it. The code from this attempt is at https://github.com/MGPAlpha/cat-detect/blob/2b9f36c2289fcfb6520dca378c804f3867aa154b/cat-detect.ino
- Long-term Tracking – In theory, a device like this could keep track of sightings over a long period of time, and use them to predict when the cat is most likely to be seen. Currently the device does keep a list of every sighting it sees, but that memory is reset on reboot due to the lack of persistent memory. There are a few possible ways to make that data persistent. We could either:
- Use a persistent power source – Finding a way to connect to a power outlet would allow the device to run indefinitely, collecting cat sightings as long as the power grid stays up.
- Local storage – We could use an SD card reader module to allow the device to save data to an SD card, so that when it loses power the data isnt lost.
- Cloud storage – With a wifi connection, the device could send its data to a cloud storage service, which would keep the data and possibly be able to analyse it for patterns offsite.
Leave a Reply