1. Concept
The future of LMC
The future of LMC 6310 is a stressful time. So stressful for the first-year LMC track lambs, that the Arduino section of the semester has become an immense, heart-racing endeavor. The pressure has escalated so intensely that students must be extra mindful, but, of course, they do not know how given the iconic GT-student genes. Further more, they also must finish the project before the end of the semester looms like a lion ready to pounce.

The dramatized solution
In a world where the academic competition is so insanely rigorous and mind-breaking, what might the solution be? Consider an outlet that challenges students to monitor their stress but in a gamified way. This project takes a user out of the high-productivity mindset, away from a screen, and into a cognitive challenge that simply encourages one to slow down.
The technical side of things
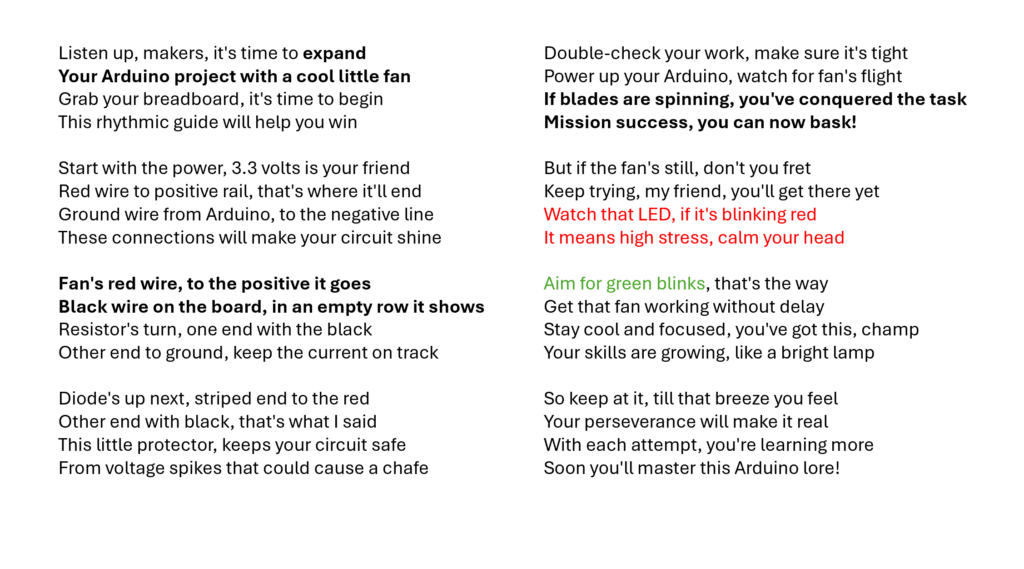
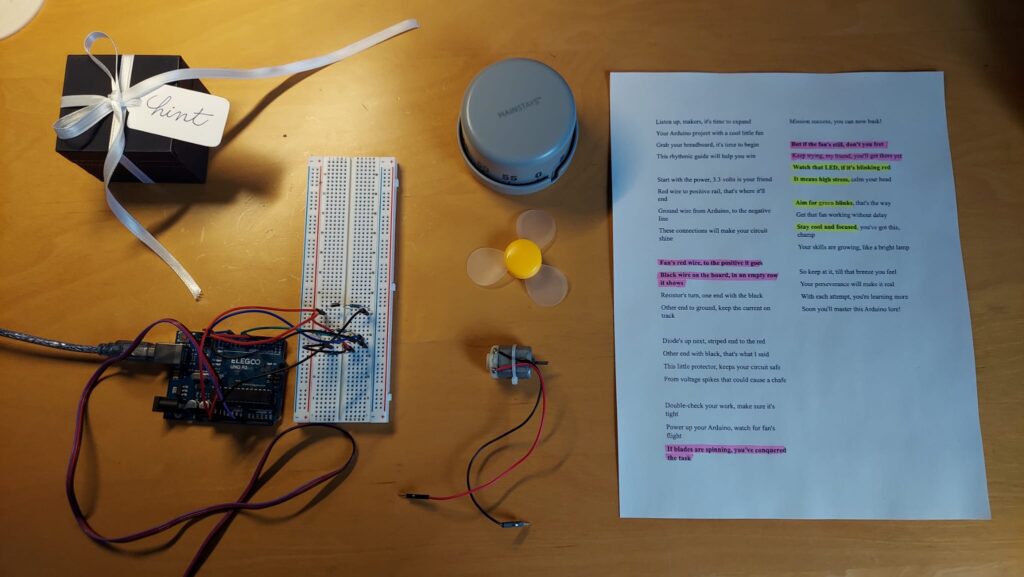
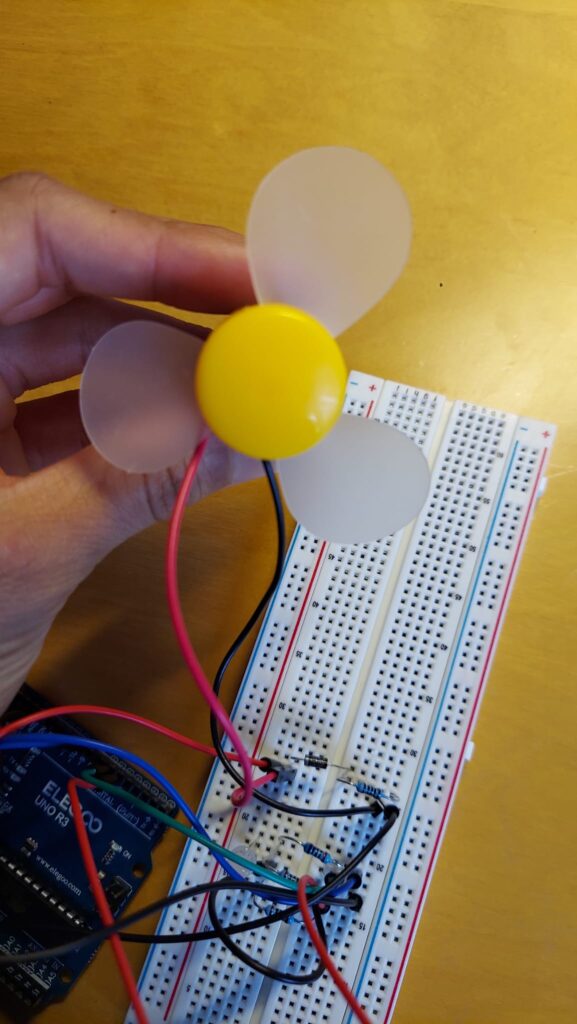
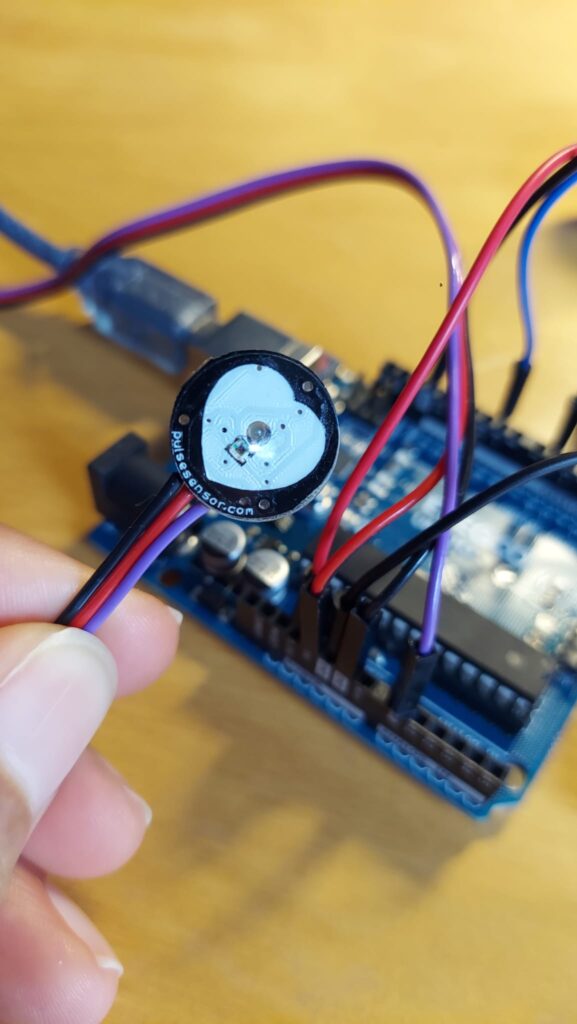
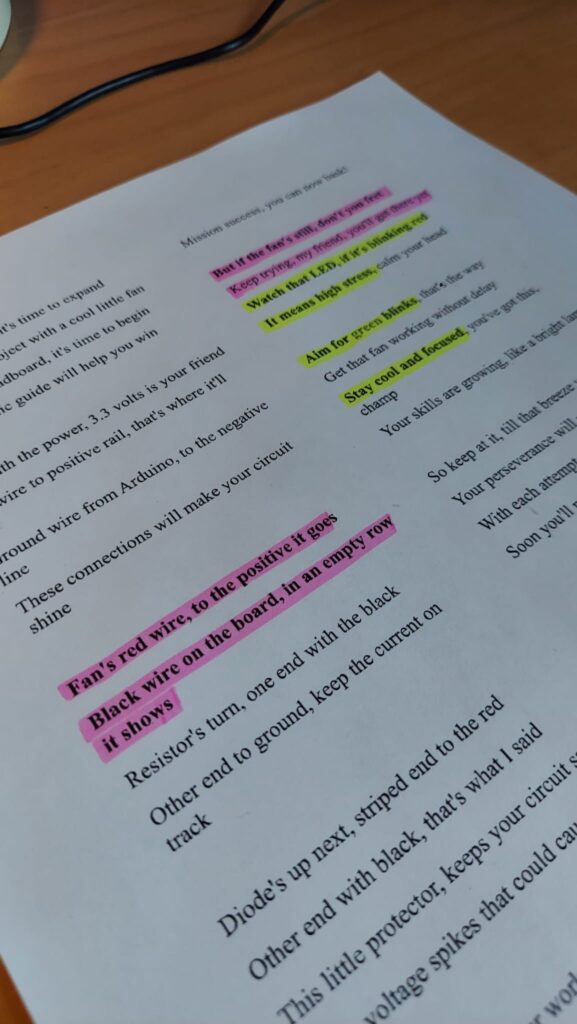
Technically, this arduino project is simple. It all starts with an external timer signalling the user to begin. Users will then place their finger on the heart rate pulse sensor, and the RGB LED will either blink red or green. Red blinks mean the heart rate is above 100 BPM; green blinks mean the heart rate is below 100 BPM. Because the student should be calming down, green blinks are good; red blinks are bad. While the LED blinks, the user must follow the printed instructions to assemble the next part. The instructions (which I did not write, but instead asked Perplexity AI to convert into a fun rap/riddle format) cryptically detail how to assemble the diodes, resistors, and wires for the addtional fan component. In the presentation, certain parts were bolded to condense the task into a shorter time frame. However, the format and choice of fan were intetionally representative of the concept.
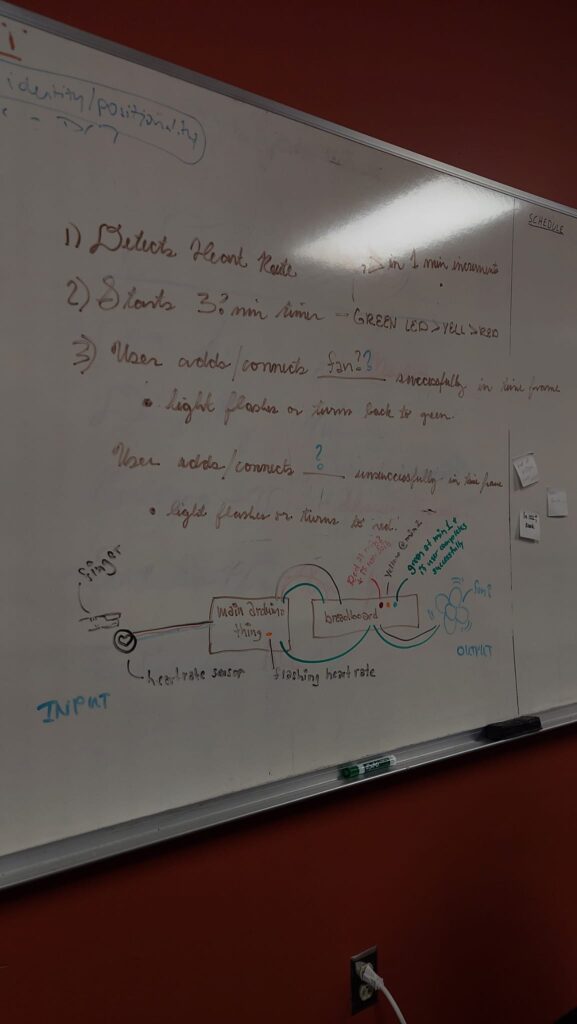
Having participants having to work one step harder to understand the instructions introduces two seemingly contradictory sides. On one hand the user has some fun with the rhymes, appealing to those who see the humor under pressure. On the other, some might see this as an obstacle to getting the task done in time. Either way, the opportunity to mold your perspective accordingly is physically manifested in the LED color. Keeping your calm will always be a good sign.
Secondly, the reason users must connect a fan is that it represents keeping your cool. Successfully wiring the fan is met with instant gratification when the blades start whirring. This is a simple way to indicate the end of the task that reinforces the concept, especially with the script’s lines, “If blades are spinning, you’ve conquered the task / Mission success, you can now bask!”
2. Process
Step 1: Exploring the heart
The process of actually building this experience started with exploring the pulse sensor I borrowed from Supratim1.
Step 2: Messing around with LEDs
After figuring out how to connect the sensor and display the BPM in the serial monitor, the next step involved exploring LED options. Initially I thought I would use a green LED and a red LED. I learned from the class the power of the RGB LED, and used YouTube to understand and borrow code from these tutorials2.
Learning about the resistors’ impact on the the light bulb brightness was also influential in exploring the the RGB LED capabilities. Thanks, Bon!
Step 3: Merge the code
Once the LED light was working and the heart rate sensor respective code sketches were working, the next steps involved merging the two together, so that the the BPM threshold changed the color of the RGB LED. This required some more work with Supratim, but with the help of another classmate, I confirmed the heart rate change successfully reflects the the LED blinks appropriately.
Step 4: Connecting the fan
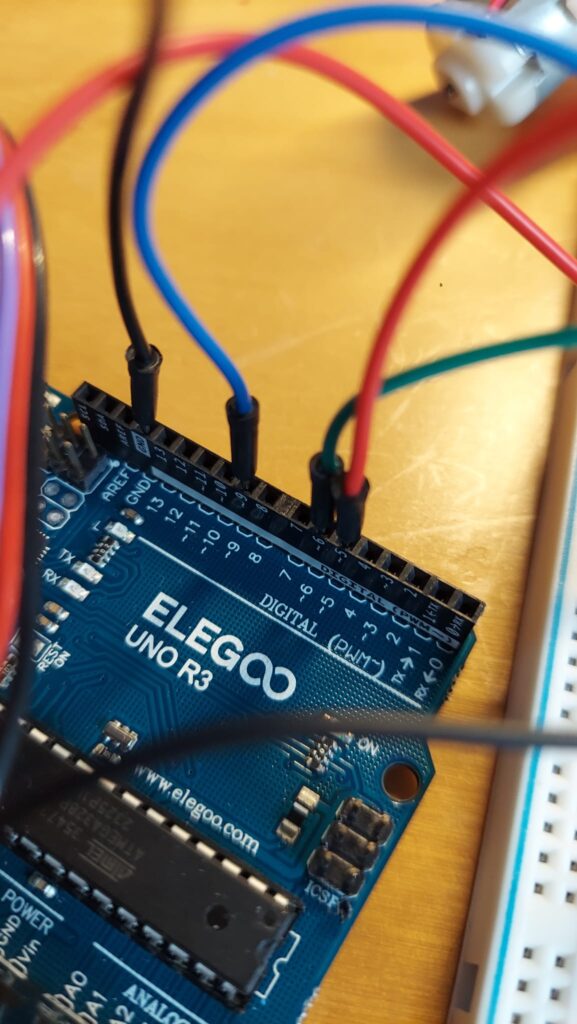
The final stage involved adding the fan to the breadboard. This required some research as I realized the 5V slot was already in use by the pulse sensor. I did not want to change that which was already working, so I focused on using the 3.3V slot for the fan and rerouting power through the bread board. The fan was still spinning incredibly fast despite the resistor and diode placement; I worried that it might cause damage to the board. It seems to be fine.
I altered the code and merged our lab session’s code, but I realized that the fan still spins even if the code is not there. I don’t understand why, but it works with my project well. Having the fan instantly spin once connected indicates success, and I didn’t want to over complicate the reward signal.
Step 5: Preparing steps for the user
From here I worked on the instructions for the user to understand how to attach the fan. I then asked Perplexity to transform the steps into a rap.
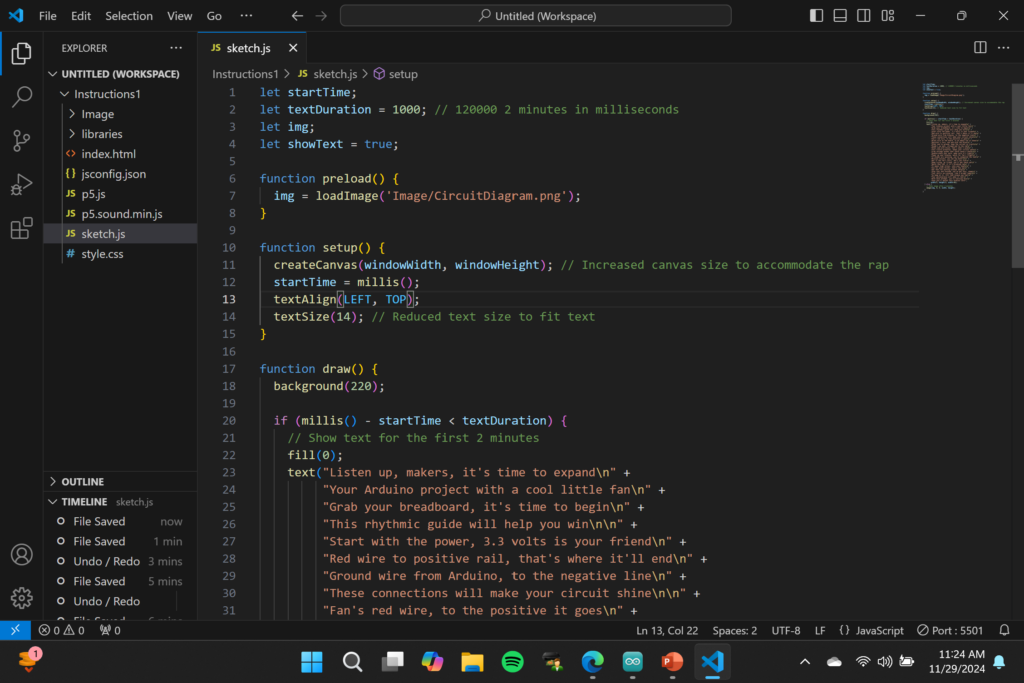
Originally, I considered having the instructions on a screen and utilizing p5 to make it more interactive. However, I abandoned the idea when it got complicated, and I realized it would be a lot on the user to monitor the time, check the color of the blinking LED, and navigate the p5 sketch to reveal the instructions plus the hint. I did not want to make the experience too frustrating nor overly complex as its ultimate goal is to slow the participant down. I think having this many components would have made that nearly impossible.
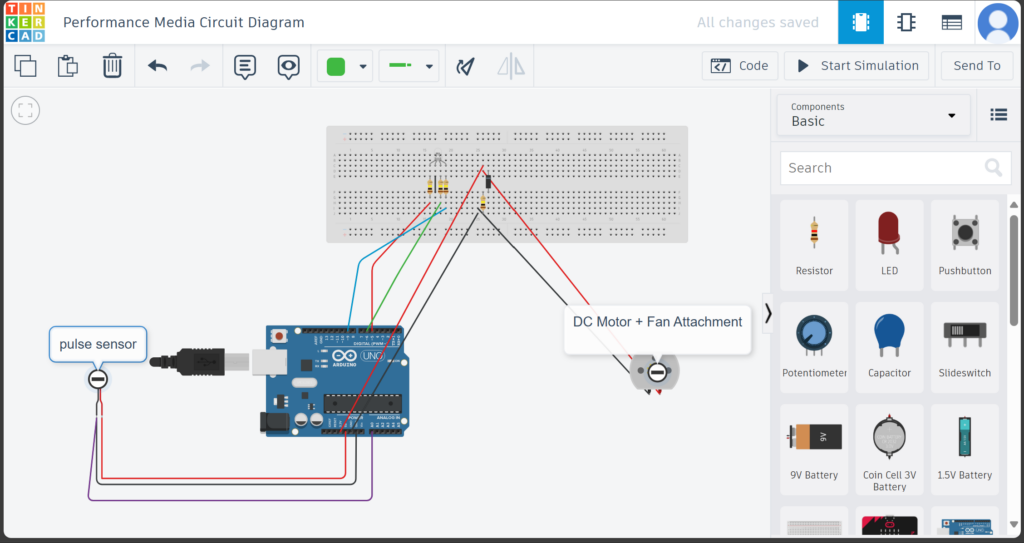
I also created a circuit diagram with TinkerCAD as a hint for the user in case they were really struggling. I placed this in an enticing box so that is appeals and gives some contrast to the hardware and wires of Arduino. In some ways I saw this as a hint token like one might see in a game. It enhances the gamified aspect of this experience.
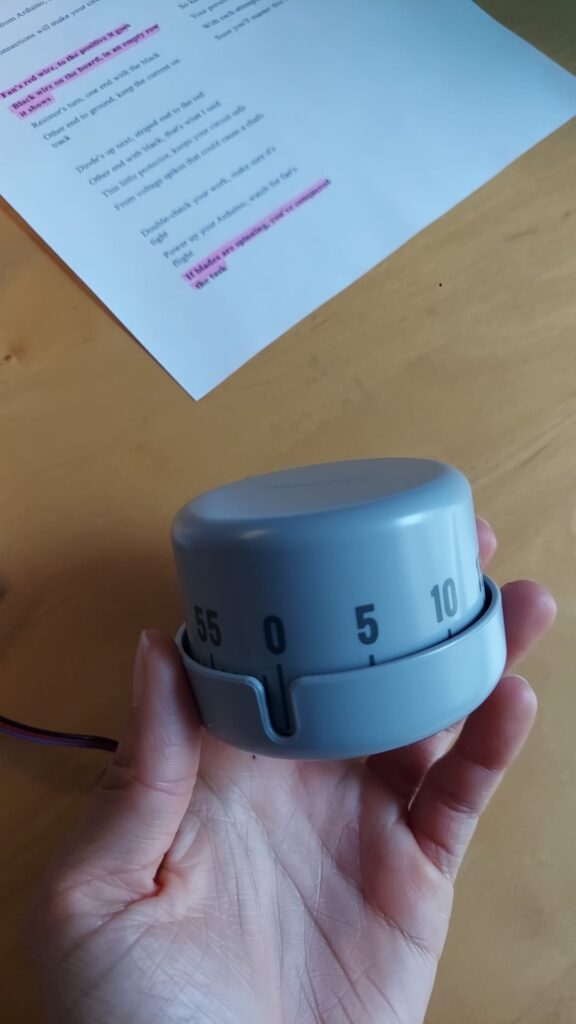
My choice to print the instructions and hint with paper and use a physical timer stems from the desire to bring students into the physical world of computers. I want users to wrestle with the circuits complements the more stripped back approach of paper and other physical items. In my journey of LMC 6310 this fall, understanding computers in more creative ways was the core of the class. Likewise, the process, whether using p5 or Arduino is arduous and detail-oriented; this project aims to reinforce that with a sense of play and pressure simultaneously. Likewise, working with screens is a much faster approach to getting things done (or at least that is the social association). For example, typing is faster than writing. However, because the object of the experience is the slow down, using screens to display instructions and hints feels counterintuitive.
3. Result
Below is the walk through of the project and how it works from the user’s perspective.
The final set up for the presentation!


Leave a Reply